Track light and profile LED
Track light and profile LED
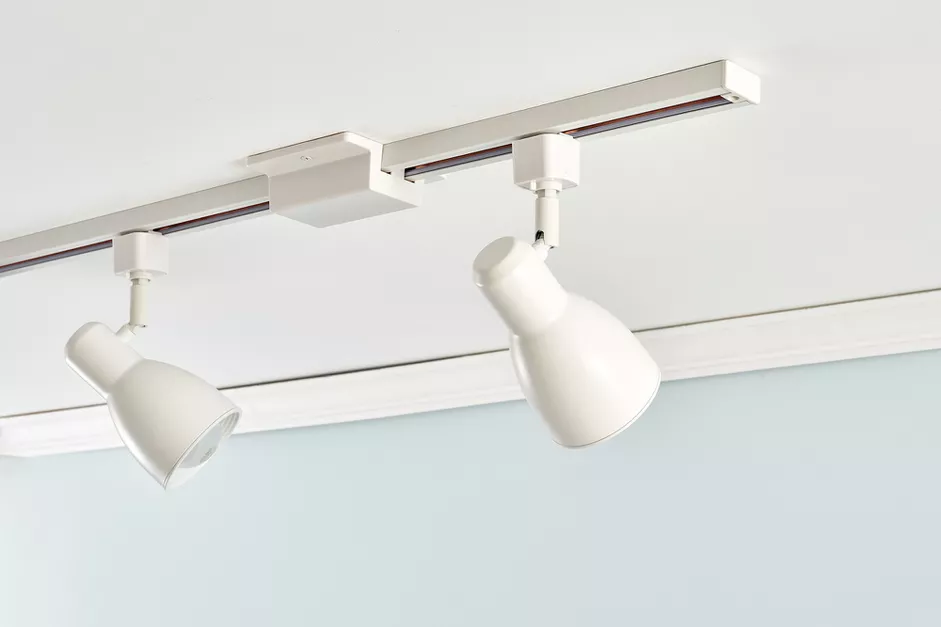
How to install track lighting
Versatile, multi-directional, and easy to install, Track Light works well in kitchens, living rooms, hallways, and dining areas.
TrackLite eliminates the need to open the ceiling in order to route wires behind drywall. Once installed, the light units can be rotated 360 degrees, and can even be slid to different sections of the track.
Only basic electrical skills are required to install track lighting. Once you tap into an existing power supply from the ceiling light, the rest is just a matter of attaching the tracks to the ceiling. Within two hours, you’ll have dependable directional lighting placed exactly where you want it.
What is track lite?
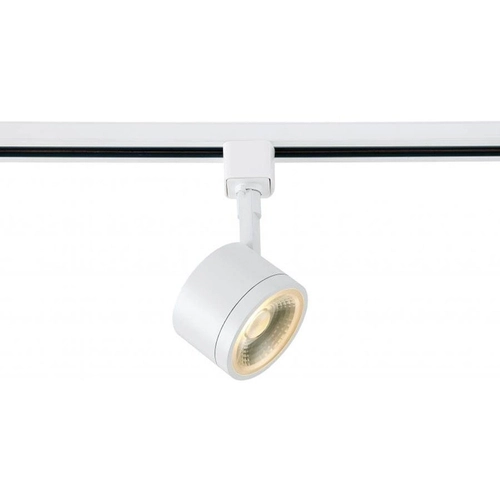
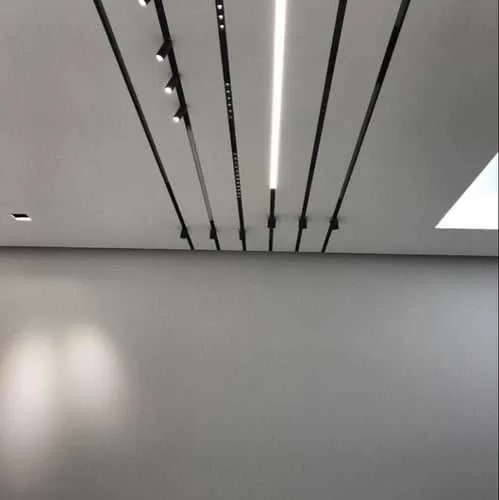
A tracklight is a surface-mounted lighting system that uses tracks or rods to supply electricity down the entire line. Individual lights called track heads can be installed at any point along the track. Tracklights are classified as directional lighting because they illuminate specific areas rather than illuminating the room in general.
 Before you start
Tracklight requires a single-branch 120V lighting circuit controlled by a wall switch. Rooms under electrical code are required to have a light operated via a switch near the door.
While a switch-controlled outlet (with lamp) is accepted by code, the requirement is often met with a permanent ceiling lamp – an ideal starting point for a Track Light.
Where to install the lighting track
Tracklights can originate in any 120-volt ceiling-mounted electrical box. Usually, this box is located in the center of the room. If you like the track here, the track will run outward from the box in 4, 6, or 8 foot track sections, your choice.
You may want to light a different area of the room, such as above the kitchen counter. In this case, the track will originate from the central roof box. One section of the path will run to the area you want to highlight. At the end of the track will be either a T-adapter coupler (for branching in two different directions), a right angle coupler (for branching in one direction), or an empty outer cover (if there is no other track piece a piece is added to the original track piece).
advice
Routes usually start with one end of the track in the electrical box — but they don’t always have to. Often, tracks can extend over the electrical box. If you want to do this, check your lighting system’s instructions to see if the mounting bracket and canopy allow it.
Safety considerations
Track heads drop 4 to 6 inches below ceiling height. So, be careful when installing tracks over driveways and walkways with ceilings less than 8 feet. Tracklight should not be installed on ceilings 7 feet or less.
Turn off the circuit breaker before you start this project. After opening the electrical box, first check that there is no power by checking with a non-contact voltage tester.
 What you will need
Equipment/Tools
- Cordless piercer
- Drill bits and drivers
- 6 foot ladder
- Wire stripper
- Electrical tape
- Gloves
- Hacksaw
- Metal file
- Measuring tape
- stud finder
- Non-contact voltage test
Materials
- Tracklite system kit 4 feet
- Replace screws
Instructions
 Planning the lighting path
Measure the distance from the box to the end of the track. Use a stud finder to locate joists behind the ceiling drywall. If the intended path of the track runs under a stud, you will be able to use regular screws. If not, use toggle screws.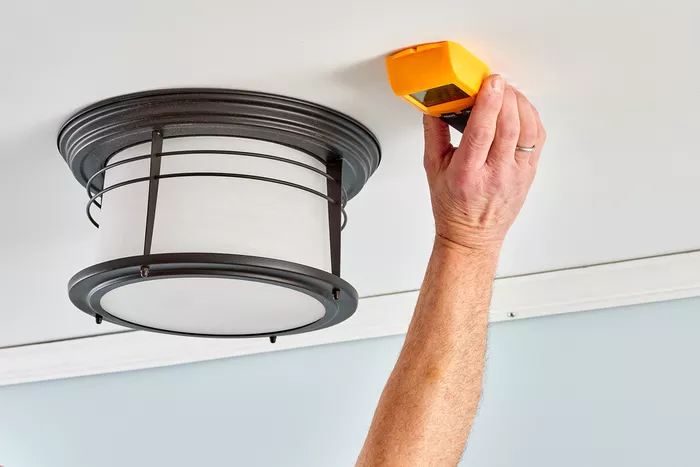
- Cut Track (Optional)
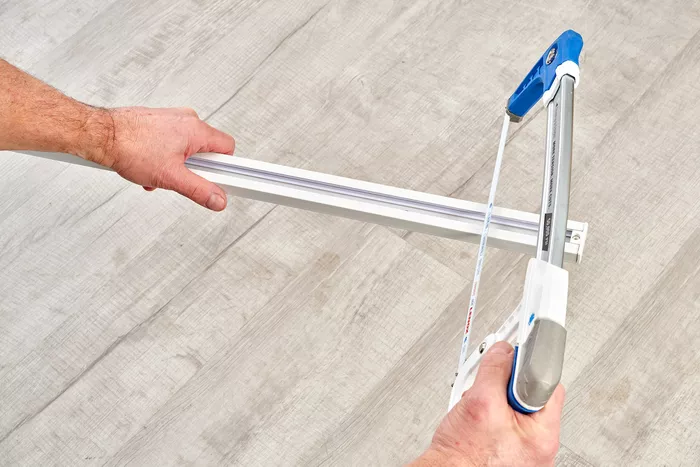
If the track needs to be shortened, most tracks can be cut to the preferred size using a hacksaw. File the end of the cut tracks with a metal file. Reinstall the dead-end fittings and lock them in place.

- Remove the ceiling lamp or front panel
Remove the existing ceiling lamp and mounting plate. If the box is covered with an empty lid instead of a light, remove it. Run a non-contact voltage tester on the wires to verify that there is no live power in the box.

- Awning separate from mounting plate
The metal mounting plate and canopy (metal or plastic cover) may be pre-attached for shipping purposes. Disconnect them by removing the connecting screws.
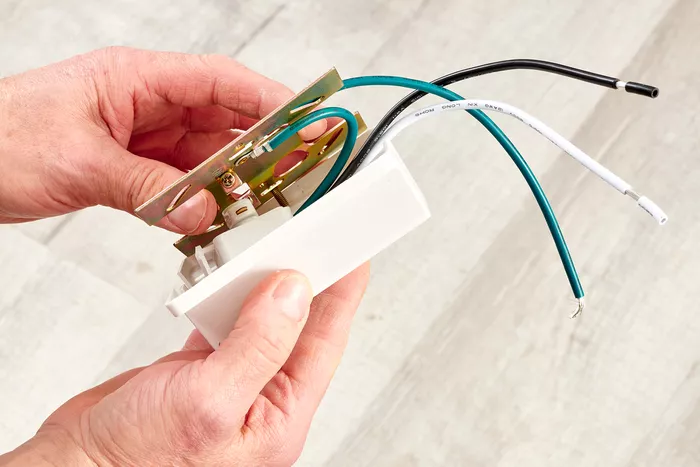
- Connect the electrical track connector to the wires
The twisted connector with wires must be connected to the electrical box wiring. Connect wires of the same color: black to black or red to red; White to white and bare copper to bare (or green) copper. Screw the supplied wire connector caps over the wires.
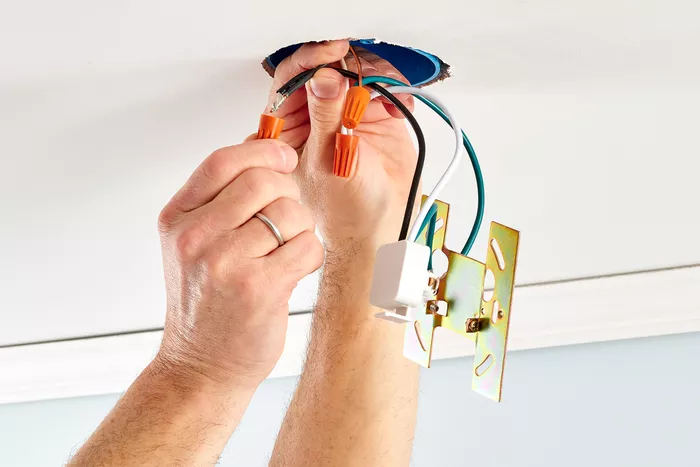
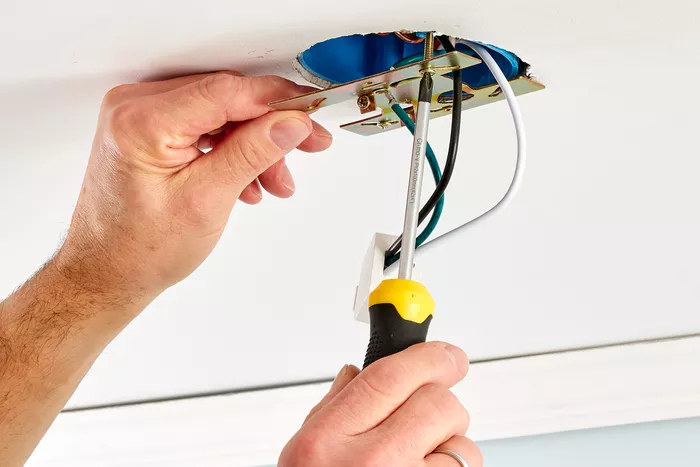
- Installing the Mounting Plate
Fix the metal mounting plate of the track light to the electrical box using the screws included with the kit.
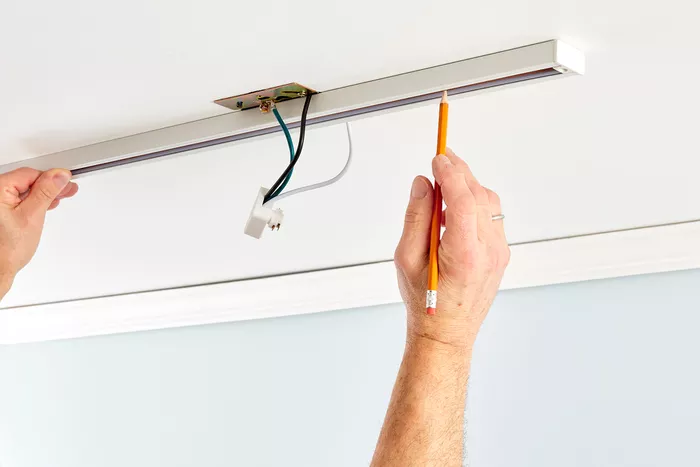
- Mark Hall Locations
Raise the track to the ceiling. Mark the drilling locations for the ceiling holes by drawing a mark through the holes in the track. Remove path.
- Install the track to the ceiling
Drill 5/8-inch holes in the marked locations. Thread the toggle bolts through the matching holes in the track. Add the wings of the screws, tightening them about 1/4 inch apart. Press the screws into the holes. Screw the screws into place using the cordless drill and tighten the track against the ceiling.
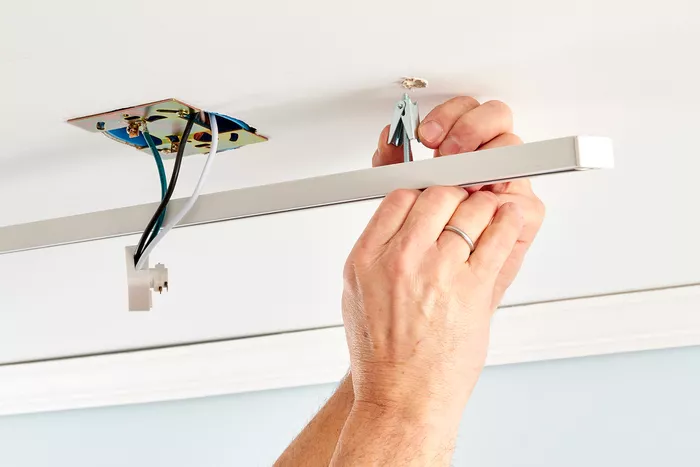
- Attach the mounting plate to the track
Attach the track to the mounting plate using the screws provided.
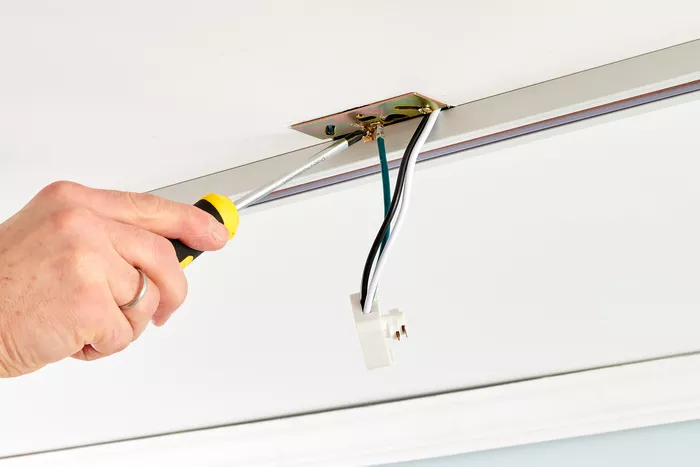
- Install the electrical track connector to the track
Wrap the electrical connector into the track.

- Attach the canopy (cover)
Attach or screw the canopy over the mounting plate. The canopy will cover the wires.

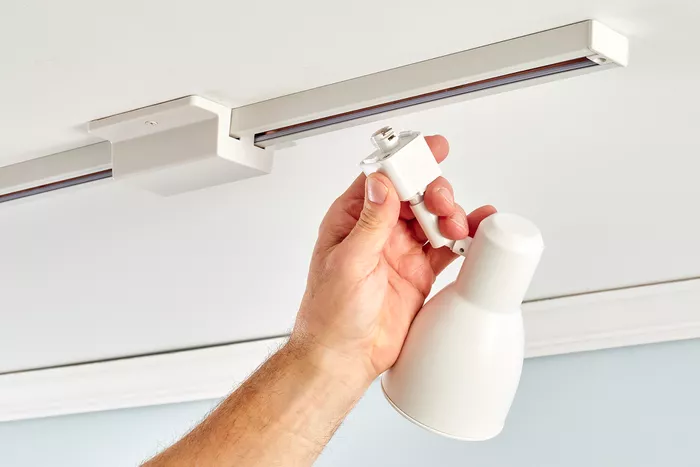
- Install Track Headers and Light Bulbs
Rotate the track heads on the track and add appropriately sized light bulbs. Restart the circuit and test the lights on the wall switch.
LED profile and its types
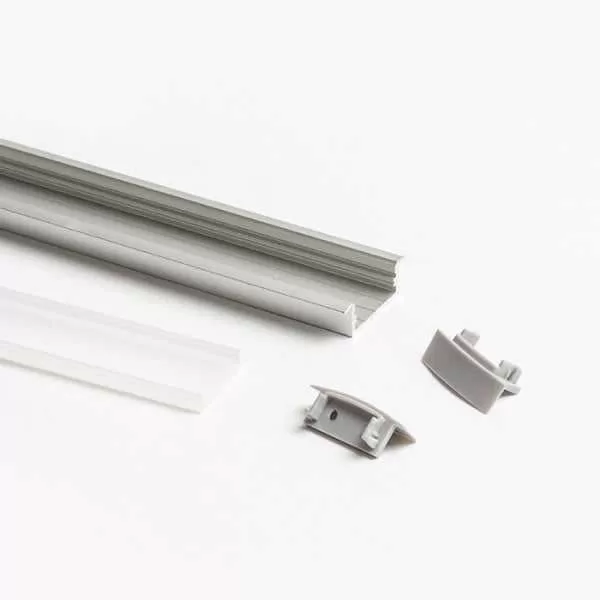 We have a variety of LED profiles to suit many uses.
LED Profile is an important aspect of any lighting project,
So we’ve written this handy guide to give an overview of the types of LED aluminum profiles we offer and some useful tips on which components to choose for a stylish, professional look.
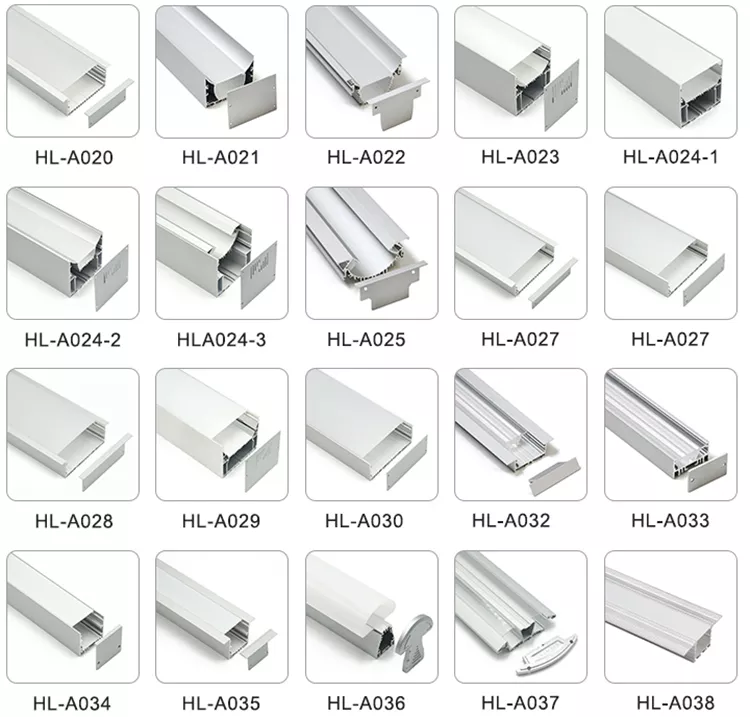
Buyers’ Guide from Jezli Hand Profile and its types
All of our LED Profiles have an optional choice of diffuser and end caps with the aim of providing an all-in-one lighting solution.
Through this guide, we will look at the following areas:
Types of LED Profile
How to get a stain-free finish
Installing LED strip inside the formations
Get an IP65 entry rating
Types of LED Profile
We have many different LED Profile types available to suit your project requirements,
For the purpose of this guide we’ve broken them down to explore their purposes and suitability for you.
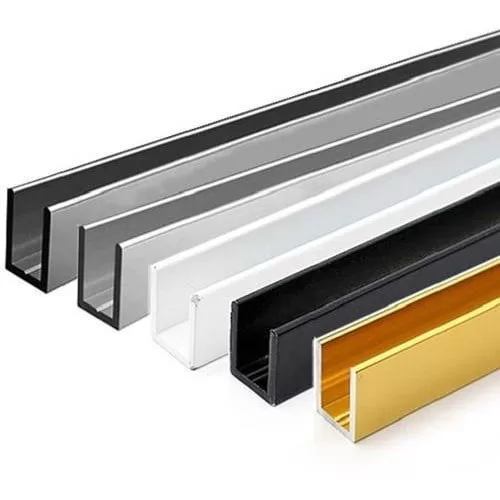
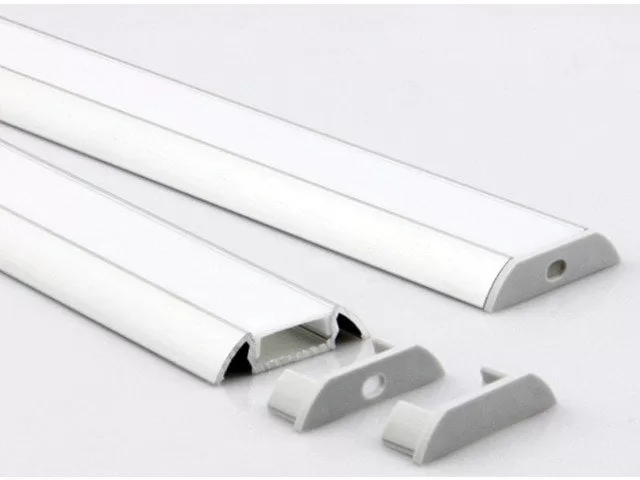 U-shaped roof lining
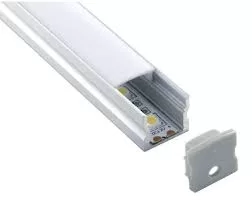
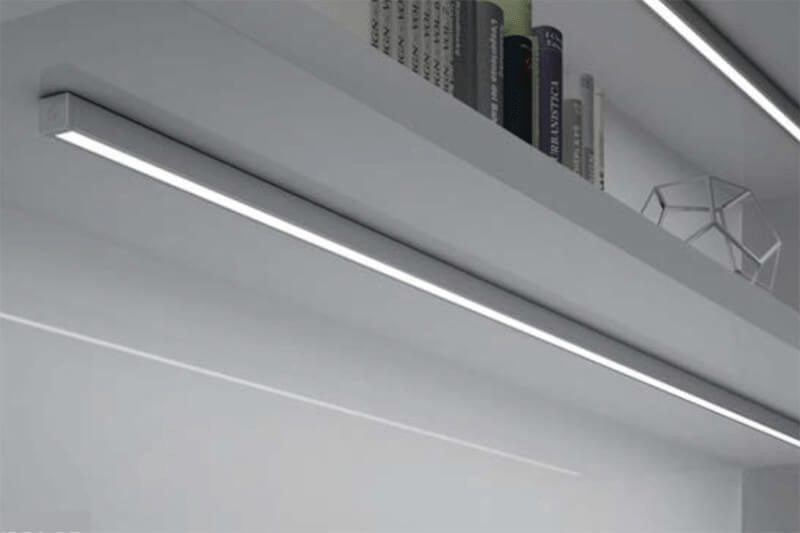 This is a standard profile LED designed to house a strip up to 12mm wide.
These U-profiles also have small width sizes for slimmer bars where a thin line solution is required.
They are designed to be surface mounted using mounting brackets, which are sold as optional extras for each individual LED profile.
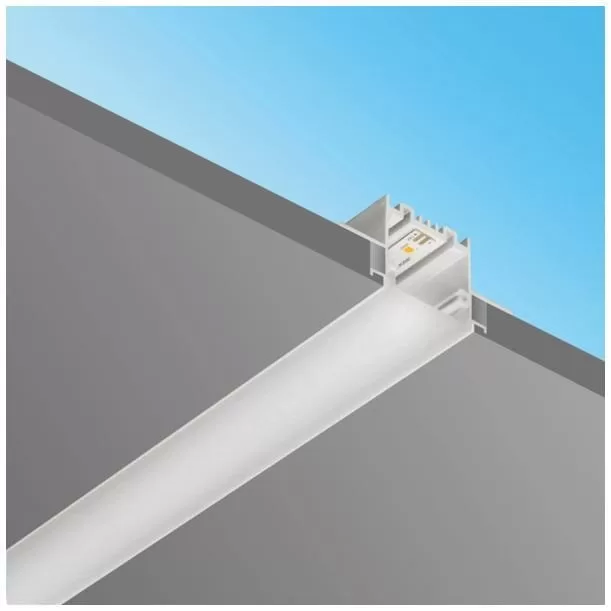 U-shaped burial
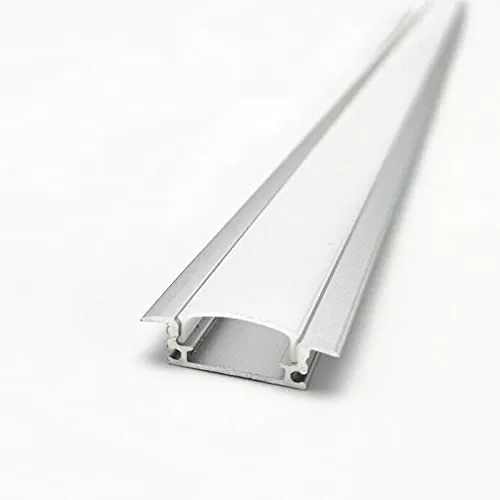 Standard Profile LED is designed to be installed in any surface and gives a smooth lighting effect on the desired surface, designed for standard width strip up to 12mm wide.
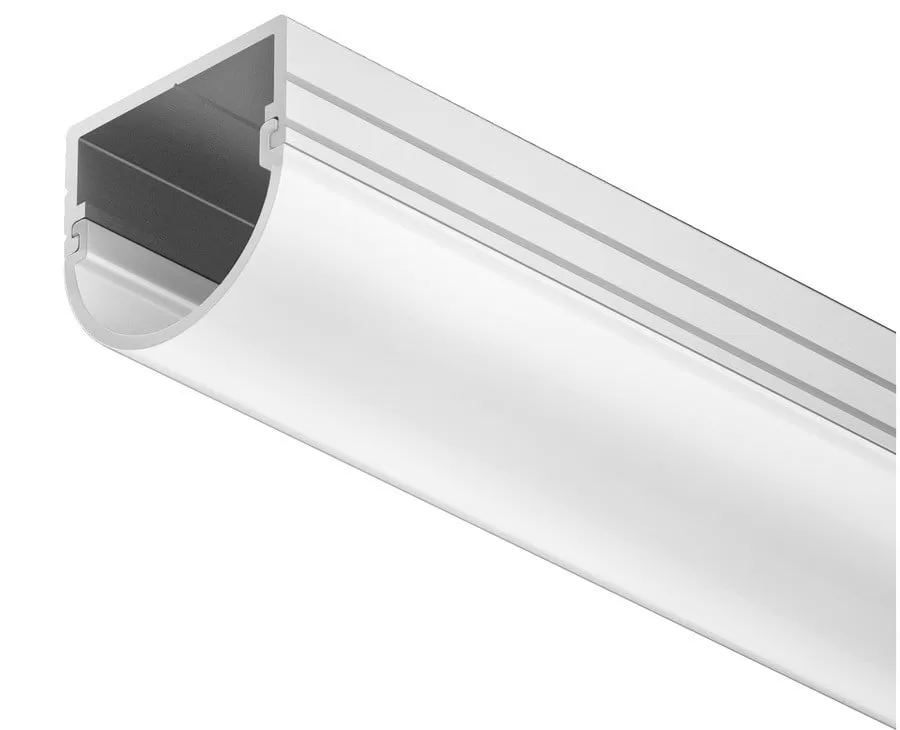 circle
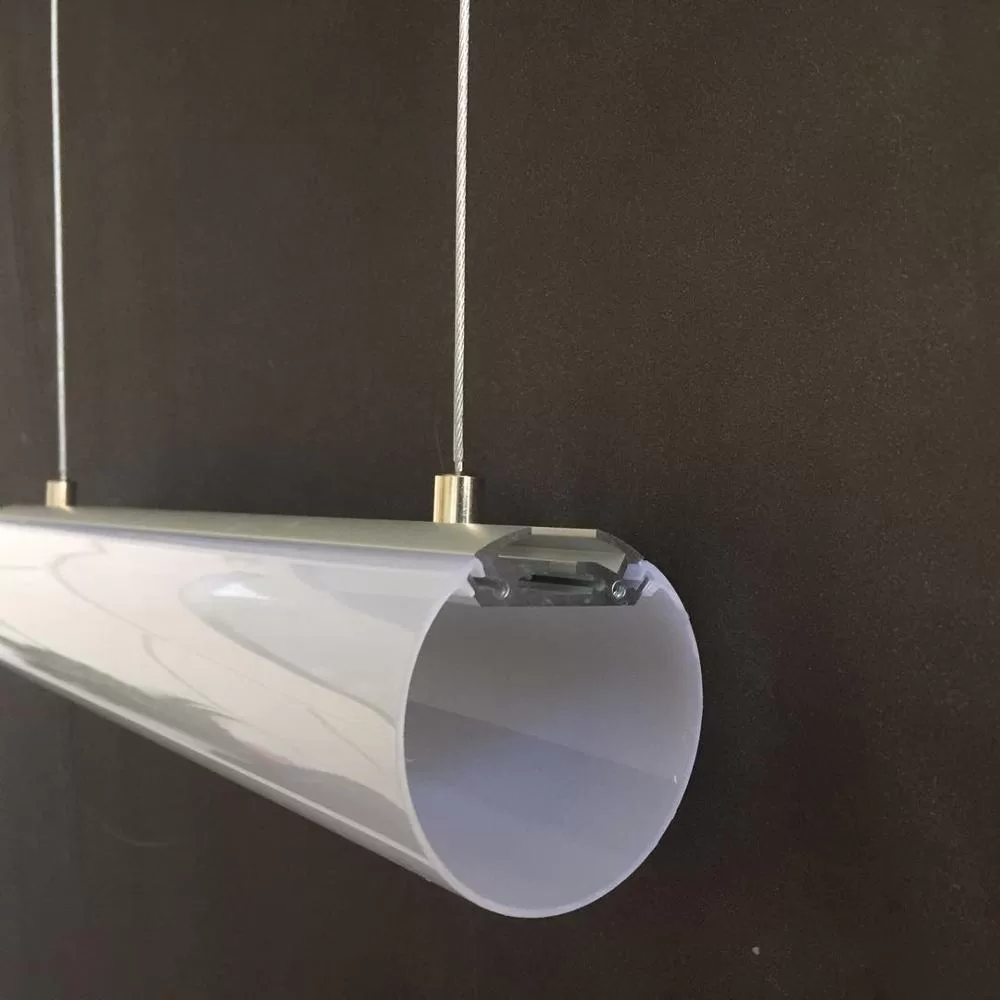 Circular profiles are usually hung but can also be wall mounted to provide a stylish finishing touch with 360 degree lighting capability on some of our circular channels.
These profiles can be used to achieve the highly desirable tube lighting effect.
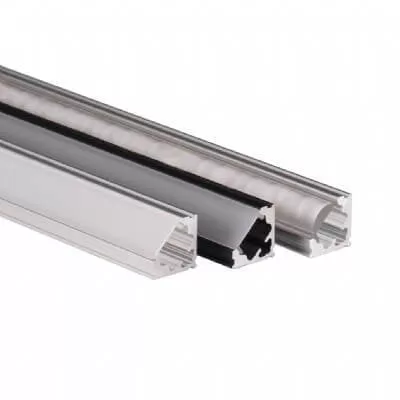 Corner features
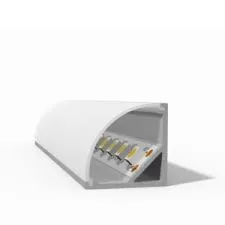 LED Corner Profiles are best used when lighting is required in a 45 degree angle setting, either on the floor, under surfaces, or in wall corners.
 Floors
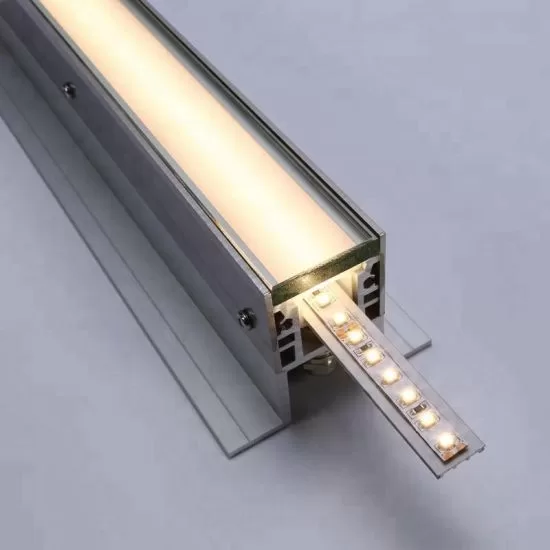 This is a sturdy profile LED, commonly used for recessed flooring where increased weight is likely to be placed on its surface.
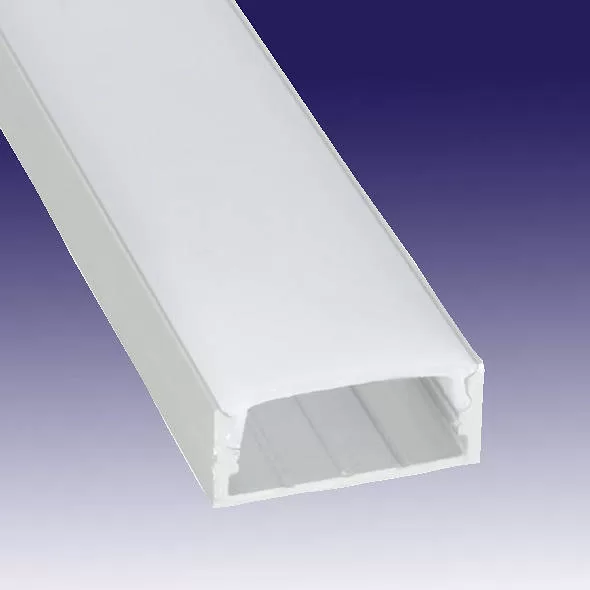 LED Profile Plaster In comes in a selection of different widths and protrusions to suit your needs.
We offer slim width, standard width, extra width as well as interior and exterior corner options.
Designed to create an elegant, flawless finish.
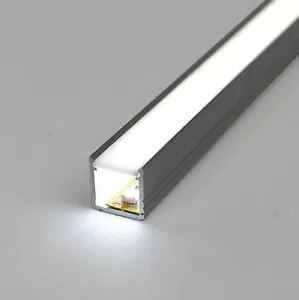
Architect
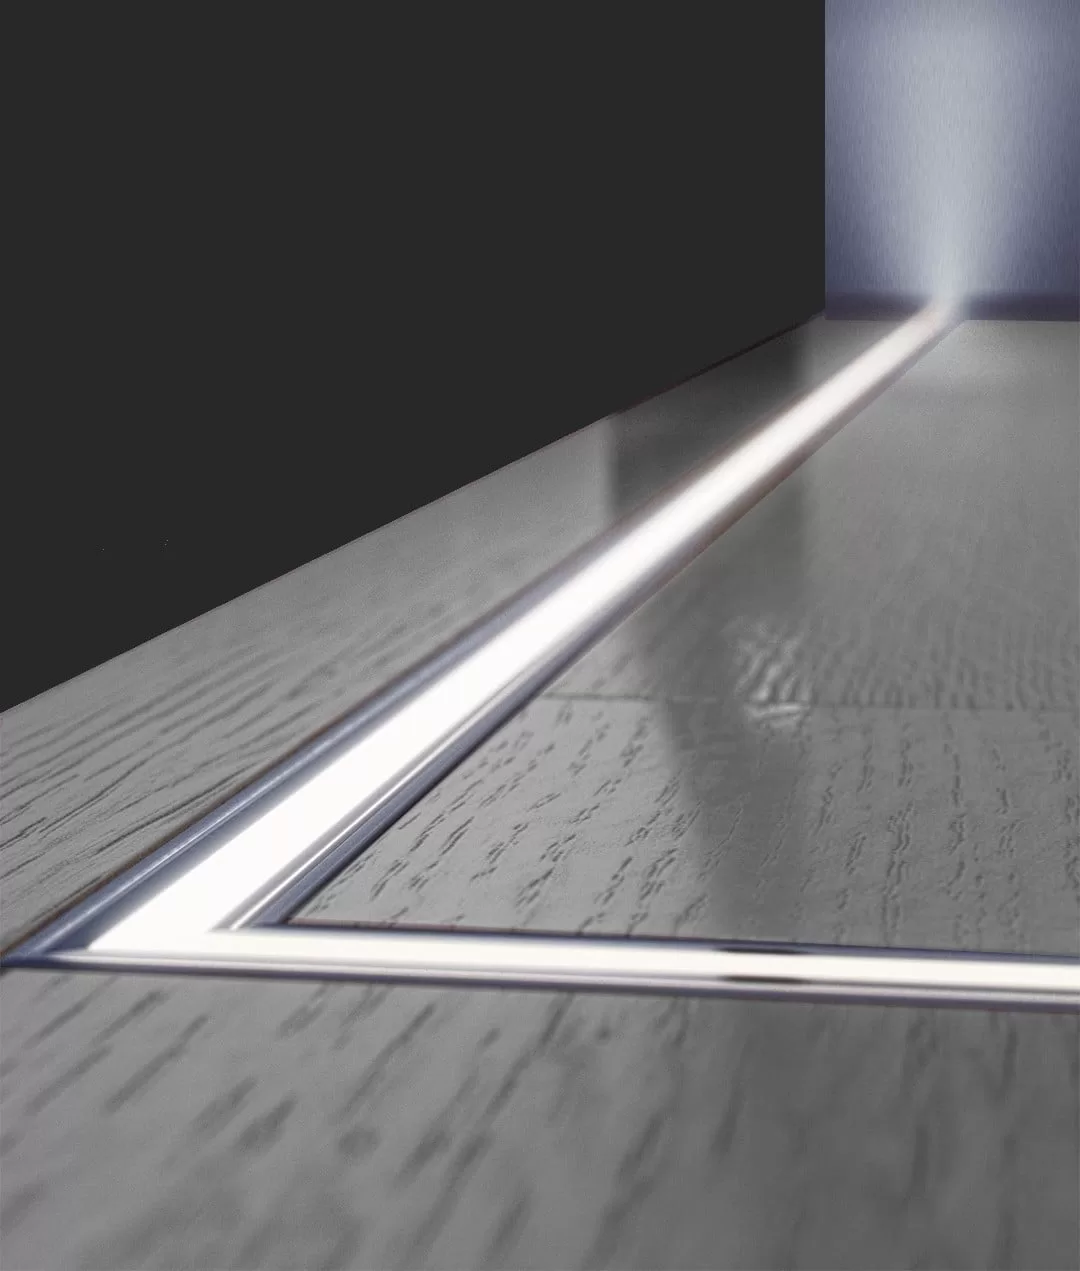 Commonly used in architectural applications, this profile is designed to sit within the wall structure.
IP65
We also stock a variety of LED profile IP65 for wet environments, ideal for use in bathrooms and kitchens where light water exposure may occur.
They are commonly placed in the PC case to ensure no leakage, and we have LED profile
U-shaped, Angle, Walkover, Circular IP65.
How to get a stain-free finish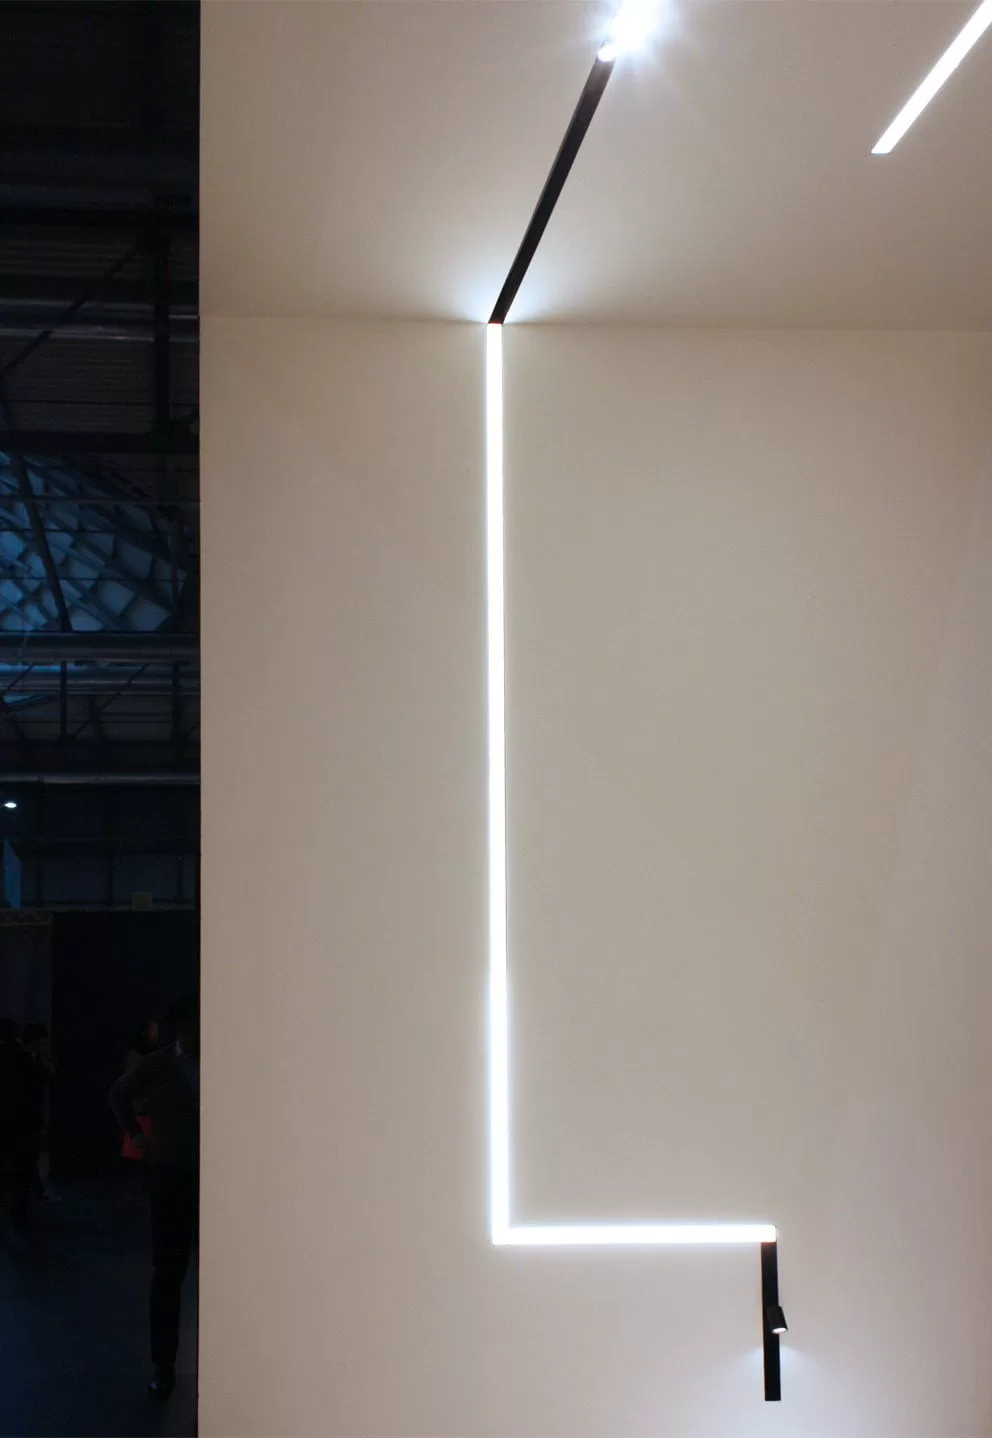
We realize that the finish of your project is crucial, and what is needed is a quick finish, and a smooth, elegant finish.
We refer to this as no detection as there are no dark spots visible along the linear light source.
Below is a recommended approach to purchasing components for your LED profile to help you achieve that unobtrusive look.
Consider the depth of the profile you use
When choosing your profile, the depth of the profile will have an impact on the unnoticeable finish
, since the deeper the profile, the more light must be scattered against the diffuser.
Selecting a deeper diffuser will also have an impact on brightness,
The more lights from the diffuser, the less bright the overall finish.
Choose the appropriate tape for the profile
A bar has a number of lights per metre, when trying to achieve an indefinite termination,
Selecting a strip with more lights per meter will help ensure your finished project goes undetected.
We have two main tapes available that we recommend to help achieve this.
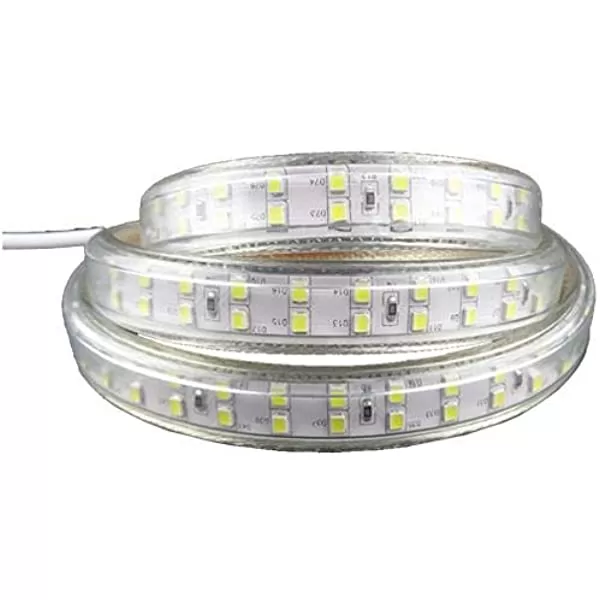
double User-friendly range of 120 LEDs per metre, more suitable for projects on a limited budget.
Best suited for the more professional, large-scale project where quality and sustainability are essential.
 Choose the right publisher
We stock 3 main types of dispensers
Transparent – Used to achieve maximum brightness, this diffuser will not be able to provide a spot-free finish
Almost obvious – brightness is important but not essential,
It will provide undetectable capabilities if the correct tape is used. In this case ,
We recommend using tape to achieve a stain-free finish.
Opal – Used when the finish is with maximum intent, and the least possibility of diffuser spots when lighting
As an example of an undetectable light bar, we have an aluminum profile with a semi-transparent diffuser and matching end caps.
The strip used here is triple with 240 LEDs per meter.
Installing tape inside formations.
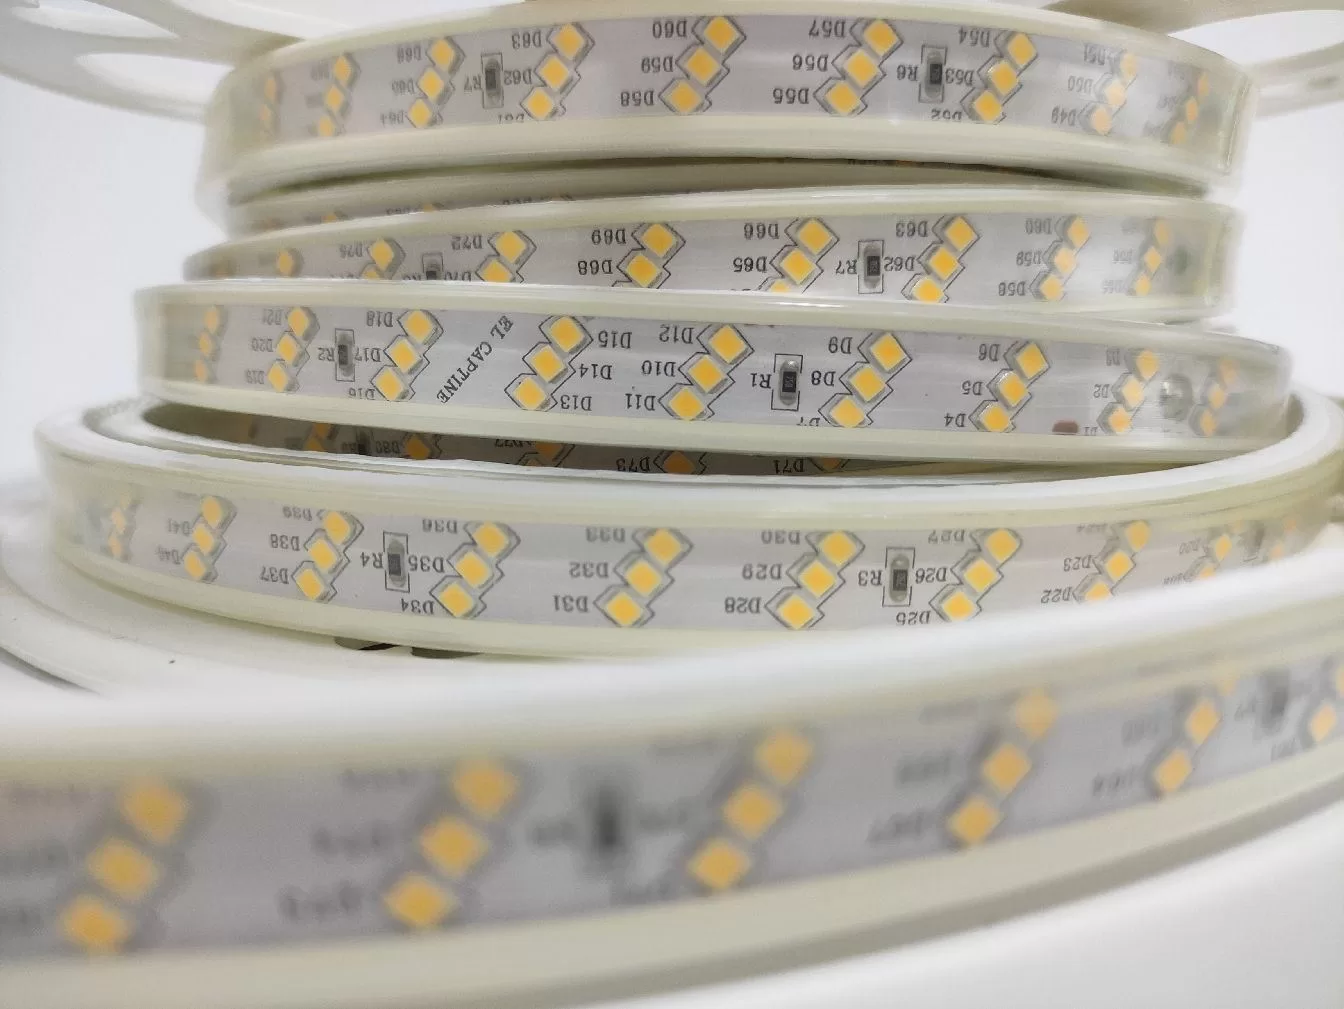 When choosing the right strip for your project, it is important to take into consideration how the strip will be placed within the LED profile.
The first aspect to consider is the width of the tape.
The tape should be thin enough to fit into the channel, if the selected tape is too wide, it will not fit into the channel.
The cutting points of the tape are a factor to consider and how to measure this for the profile lengths you need.
The cutting points on the strips are variable so it is important to take this into consideration when choosing the right strip for the intended length of the LED profile.
It is recommended that a 24V strip is required as there is less chance of a voltage drop and this reduces the risk of spotting in the end product.
If the strip is too short, or too far from the end cap where the wire is installed, a dark spot will appear at one or both ends of the linear light,
This is not desirable.
Get an IP65 entry rating on the profile
When creating a lighting installation for environments that require an IP65 rating, it is important for us to profile the LED as IP65 and ensure it is properly sealed to avoid any leaks.
It is highly recommended to use an IP20 or IP65 strip inside an IP65 profile LED and it is not highly recommended to use an IP65 strip inside an IP20 profile LED.
If an IP65 strip is used inside an IP20 profile LED,
This is likely to allow moisture to enter the LED profile and cause condensation within the profile, corroding the strip and causing a potential hazard within the circuit itself.
During installation, we recommend sealing the ends with silicone to reduce the risk of any water leakage.
SomeLED stripsused in LED profile
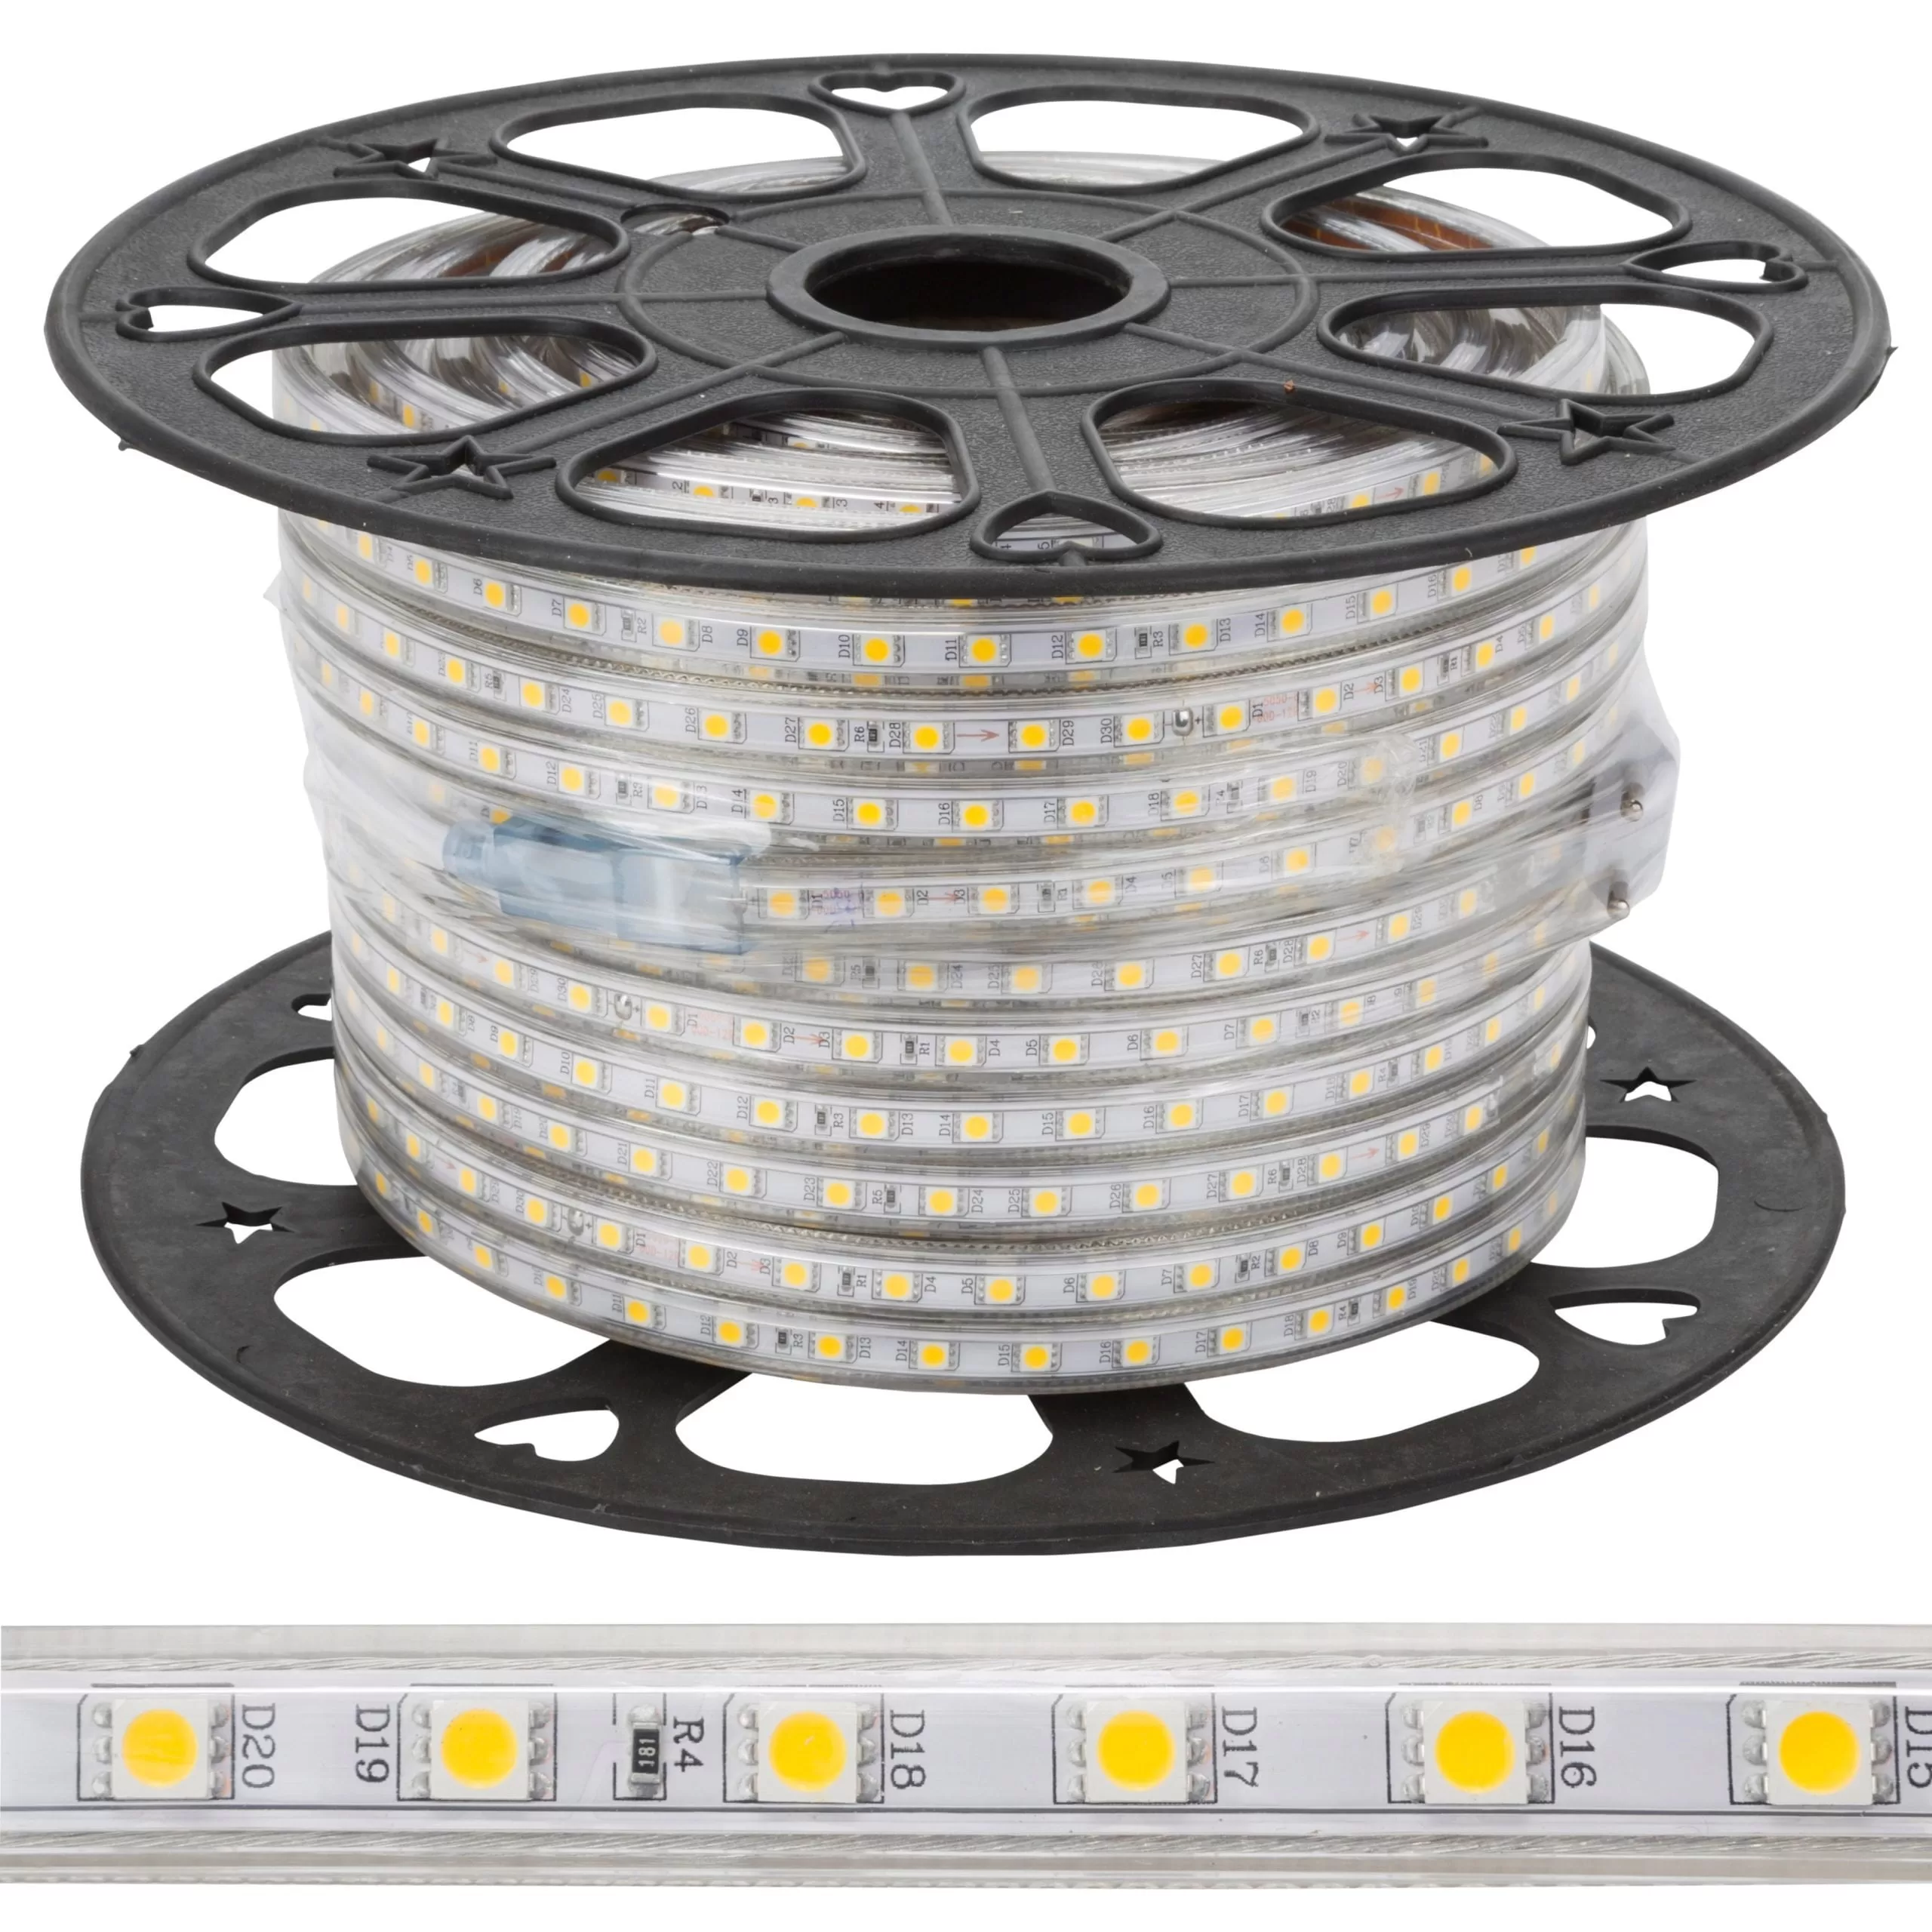 LED strip lights are becoming more and more popular for home lighting.
You’ve likely heard the debate about LED bulbs over incandescent and even halogen bulbs:
They are more efficient, brighter, longer lasting, don’t produce as much heat, can be easily controlled and programmed…the list goes on and on.
LED lights come in very compact, sturdy and impact-resistant packages, making them can be used in a variety of ways.
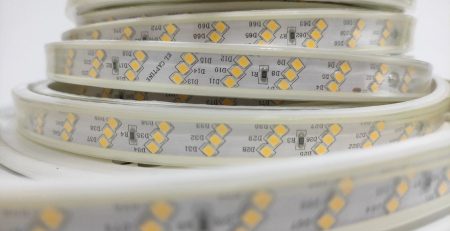
One increasingly popular method is LED strip lighting.
Linear (strip) lighting has become very popular and has become an affordable option for both commercial and residential lighting applications.
Purchasing LED strip lights may seem relatively easy,
But there are several things you need to consider to make sure you get the right type of light for your needs.
Follow this post as we walk through the important factors of LED strip lighting and go through our full line of LED lighting strips.
Types of LED strips
The LED strips category is a broad category that includes all the different types of LED strip lights.
Depending on how you plan to use the LED strips, you may need one type over the other.
For example, IP65 flexible LED strips are better suited for outdoor and wet areas as they have a protective covering that makes them waterproof.
Below is a brief description of each type of LED strip lights,
This guide will go into more detail later because there are multiple types of strips in some of these categories.
DC LED – Powered by 12VDC, these flexible strip lights have an adhesive backing for easy installation and can be cut to 2 inches.
They are offered in waterproof options and come in 30 LED/M or 60 LED/M.
AC LED – Flexible strip lights that operate directly from your electrical outlet.
Just plug them in and they are ready to go.
LED Rope Light – Multi-directional packaged LEDs in a standard rope light package.
High Output LED Strips – High power LEDs from Cree, Luxeon, and Nichia are mounted on solid strips with onboard drivers and circuits.
LEDs/Length
When purchasing LED strip lights, it is important to look at the number of LEDs per length.
For brighter output and higher light quality, you should look for strip lights that have the highest number of LEDs per foot (meter, yard, etc.).
If the LEDs are spaced too far across the strips, they can produce intermittent light instead of a constant line of light.
It can be confusing because manufacturers use different units of measurement to advertise this.
My recommendation would be to stick to a specific measurement and then convert all the other measurements to see which strips have the most LEDs for each specific unit of measurement.
Note that this is not the only factor in determining brightness and light quality.
For example ,
The LED Rope Light has more LEDs per foot compared to flexible DC LED strips,
But they are dim LED lights and are more visible than flexible strips
So always check the brightness of the lights as well.
LED strip brightness
As LED technology continues to improve, LED strips continue to reach brighter capabilities.
This doesn’t mean that all bars will be super bright, and in some cases, you may not even want the light to be super bright.
An example of this is accent lighting inside the shelf.
The brightness of LEDs is measured in lumens.
Depending on how you use your LED strips, you will probably want a certain level of lumen.
For accent lighting, you probably don’t want anything brighter than 200 lumens per foot,
But for other applications where you want more light, it just depends on your personal preference of how bright you want it to be.
Therefore, make sure to note the lumens/length along with the LEDs/length as this will have a strong impact on the light quality and the type of light the strip emits.
LED strip colors
Our LED strip lights come in a wide range of single colors as well as multi-color (RGB) strips.
. The simplest LED strip lights are single colors that emit only one constant color of light.
We offer them in: warm white, neutral white, cool white, red, green, blue, yellow, and ultra violet (UV).
Color changing strips are called RGB strips. These LEDs can display any combination of red, green and blue colors.
These strips require a controller to change colors in flashes or stay on a specific solid color. Take a look below to see how these strip lights work and look.
Color temperature
Color temperature is how we differentiate between the different white colors an LED can produce.
Temperature refers to how “warm” the light appears. Or “cold”.
Temperature is measured in Kelvin with higher temperatures representing cooler colors (a blue hue) and lower temperatures representing warmer colors (yellowish light you would expect from a bulb).
See below for more visual explanation.
 Different LED profile shapes
LED Profile has become so ubiquitous that you can see it almost everywhere these days. However, they are not all the same.
Here are the most common types of Hand Profile:
- LED Profile Fixer
Surface mounted (U-shaped) LED profiles are the most common type of LED profiles.
These are incredibly easy to install and come with mounting clips and end caps.
As general purpose lighting, surface mounted LED Profile LEDs can be installed on various surfaces (under kitchen cabinets, ceiling, cabinets, etc.).
The options in terms of shape and style are endless when it comes to surface mounted LED coils.
1 Latash LED Profile
- LED profile installed on recessed
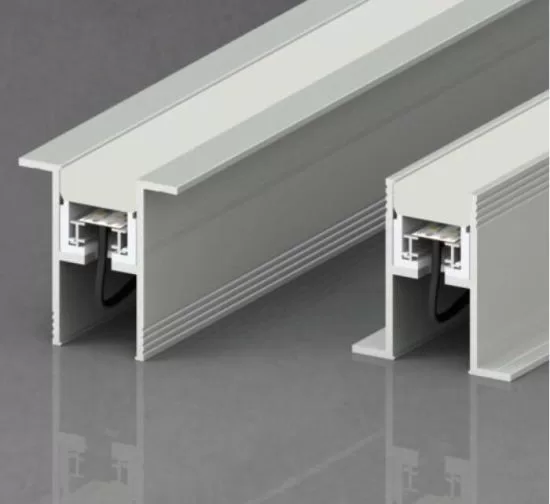
T-shaped profile LEDs are embedded into the surface for a cleaner, more precise aesthetic.
We use these LED profiles mostly on wooden surfaces such as shelves or cabinets.
These are mostly similar to surface-mounted LED profiles, except that they fit into the surface rather than being mounted on top.
To install the LED Profile recessed fixture, you should hollow out the surface before according to the width of the LED Profile.
2 Convenience of installing LED profile
- Side side light
The corner mounted profile light has a vertical angle, it can be placed in the corner.
You can install it in the wall corner, ceiling, shelf, cabinet, stairs, etc.
Its installation is similar to a surface-mounted Profile, except you have to install it in the corners.
These lights are very popular these days because they can illuminate a space very efficiently. Light is spread evenly on both the x- and y-axis.
3 Conner LED Profile
- LED profile for walls
LED Profile provides a cleaner look because this type of LED Profile hides all the wires and strips in the wall.
However, they may not be easy to install and may also require professional installation with careful planning beforehand.
Plastering LED Profile into ceilings and walls is longer lasting, so this is a permanent lighting setup.
These are more common in offices, shops and other commercial spaces with plasterboard ceilings.
4 Drywall profile lighting
- LED Profile Pendant Light
The Profile LED Pendant Light is a contemporary lighting design with ducts.
We hang LED profile lights from the ceiling with a cable.
This type of LED profile is suitable for spaces with very high ceilings so that the suspension brings the lighting closer to the surface.
Hanging profiles have become decorative, with many builders using them at varying heights to create eye-catching centerpieces for lighting.
However, they are more visible than other types of channels.
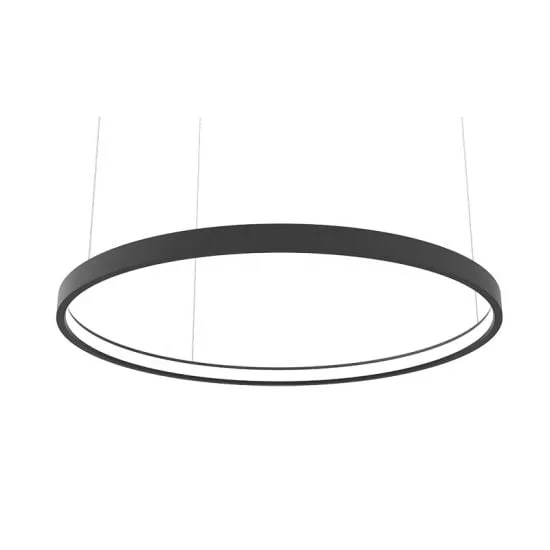 5 LED Profile Pendant Light
- Circular extrusion ring
O-ring pull rings are designed in a circular shape.
Generally, these are suspended profile LEDs that hang from the ceiling.
This specific type is more decorative than practical, and you’ll see it as center lighting in commercial spaces, as well as in homes.
It is an ideal choice for office meeting rooms, high halls in shopping malls and hotels.
Can be customized to any diameter required.
The lighting direction can be up and down or inside and outside.
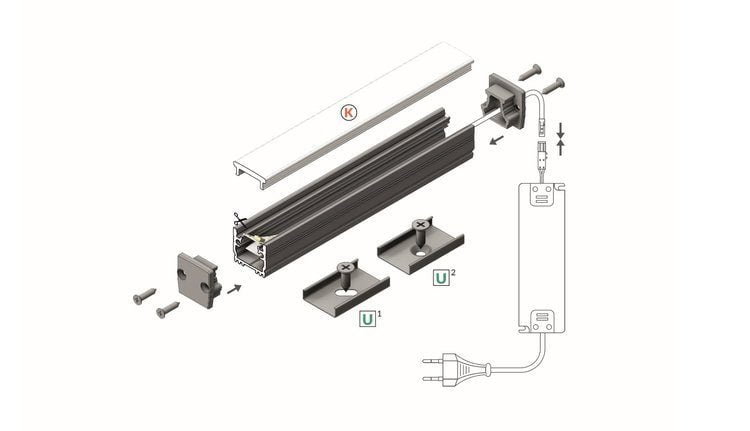 What are the components of LED aluminum profile?
The Aluminum Profile LED System is not just made of aluminum.
Some parts and other materials go into creating tow materials.
Here are the raw materials you will find in LED Profile made of aluminum:
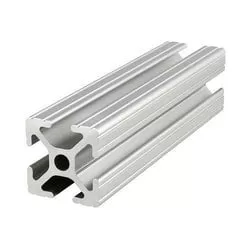
Heat sink (aluminum profile)
Heat sinks are a vital part of lighting structures.
While lamps are known to not heat up, they do produce some heating. They are simply cool to the touch, but their conductors internally produce heat at the expense of lumens of light.
The heat sinks are made of 6063-T5 aerated aluminum. Their job is to transfer heat to the outside air.
Fin heat sinks are most commonly used in lamps, including retractable ones, because they provide a greater surface area.
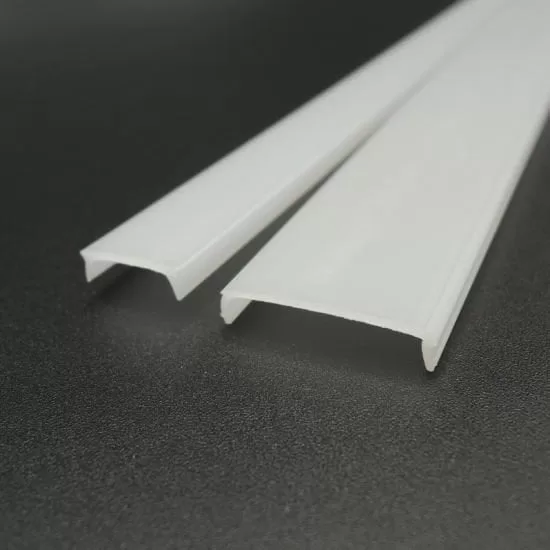 Publisher PC
Diffusers are mainly made of polycarbonate (PC).
. For example, in LED Profile
,We use PC from Japan.
It is high quality, durable and tends to have higher permeability.
No matter what type of PC tape dispenser you use, quality will make or break everything.
Low-quality plastic turns yellow over time and affects the appearance of the LED profile when turned on or off.
 End caps
Most end caps are made of plastic, they isolate the LED Profile from the holes and have holes for the wires.
This cover is also an essential part of the entire Profile setup because it closes the openings and makes it easy to replace the strips whenever you need to.
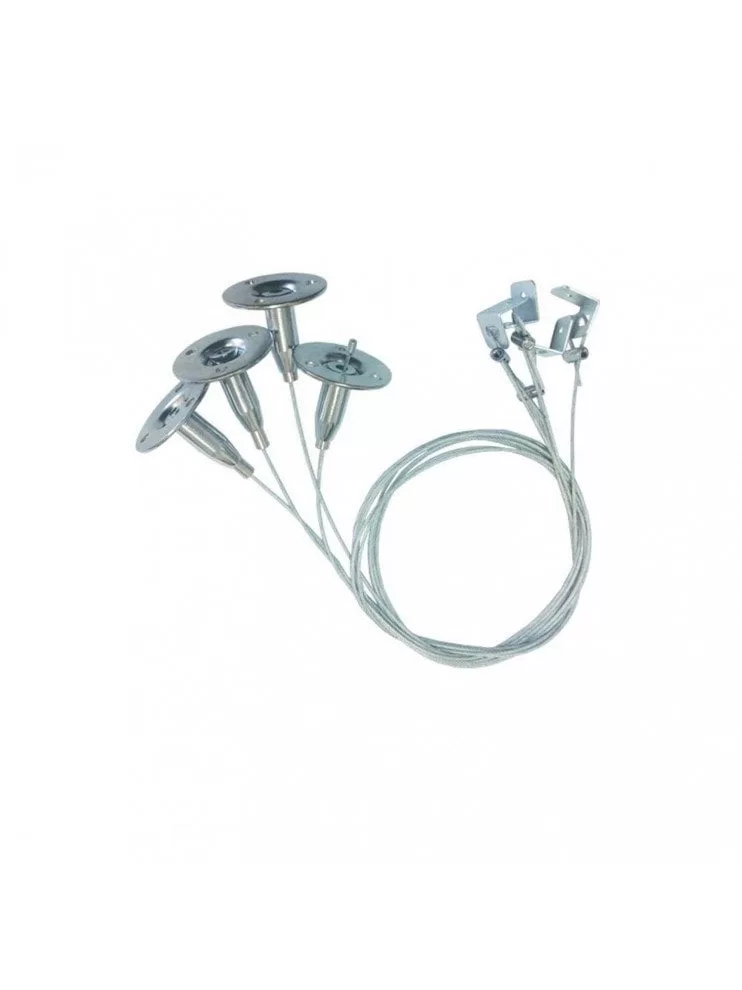 Suspension cable
For suspended profiles, you will also receive suspension cables.
This cable is attached to the wall clips and then to the aluminum profile.
This cable is strong yet flexible, and is usually made of stainless steel as well.
 Stainless steel clips
Fasteners for profiles are usually made of stainless steel (201/304).
These clips hold the aluminum surface to the base surface where you mount the LED profile.
These make installation a breeze as you just have to attach these clips to the surface, and half the work is done.
Why choose LED Profile?
LED Profile and Strip Light Diffusers may look decorative, but they are very cool.
There are many benefits to applying LED Profile instead.
Enhances heat dissipation
It’s a more technical benefit but it saves light and improves its use.
Because profiles have a large surface area (lengthwise), they can dissipate heat more efficiently.
This heat dissipation ensures that the space never heats up, and that the light strips are long-lasting.
Protects strip lights
If you place bare strip lights, they will be vulnerable to damage from the external environment.
Even water-resistant ones may not last long outside the profile.
So the profile protects the tape inside and prevents dust, water and other external elements from damaging the tape.
Moreover, the bar itself will not look aesthetically pleasing.
LED Profile, on the other hand, looks quite contemporary and elegant.
Enriches the lighting effect
LED Profile also improves the lighting effect of the bar and the room in which it is located in general.
They spread the light from the lamps onto the strip and spread it evenly across the space.
Depending on the diffuser, they also reduce heat spots, so light is not focused on specific spots throughout the profile.
In general, profiles can efficiently improve lighting without taking up much space.
You can install them in corners or under shelves where they may not be very prominent.
They can provide soft lighting and enhance other lighting fixtures you may have in the room.
Easy to install
It is very easy to install an aluminum profile.
One can easily do it on their own.
The fact that you can cut them to the length you want makes them perfect for custom lighting setups.
Likewise, the tape diffusion unit makes it easy to install diffusers by simply installing the LED profile and adding tape from the reel.
You just have to drill the mounting clips and screws into the LED profile.
It does not require a lot of tools and does not require a lot of time either.
You can also use them to get light in places where there may not be electrical connections for a light installation.
How to determine the desired LED profile?
There are several things to consider when purchasing a LED profile:
Dimensions of bar lights
The first thing to determine is the dimensions of the light bar.
While the length depends on your need and you can easily modify it, it is the width that will determine.
You will have to purchase the corresponding Profile LED.
The strips are usually up to half an inch or 10 to 12 cm wide.
You will also need to determine the length of strip you need and get the LED Profile accordingly.
The lighting effect you want to achieve
The type of profile , especially the diffusers you should choose depending on the lighting effects you need in your space.
For example, if you want to brighten up an entire room, you may want to use clear diffusers.
If you are only installing a profile for decorative purposes, you may want to consider a recessed or glued profile because they blend perfectly with the environment and look neater.
As for the light intensity, it can be controlled electronically using a lighting controller as well.
When choosing a profile light type, focus on the aesthetic you want to achieve with the lights.
Installation location
You should also take into consideration where you want to install the aluminum profile for strip lighting.
If you don’t need a long profile continuation, perhaps hanging a profile is best for you.
Likewise, if you want a bar in your closet, perhaps a corner mounted profile or a hanging shelf LED profile should be on your mind.
If you intend to completely brighten a room, choose a combination of ceiling profile and wall-mounted lamps.
Installation type
Finally, think about how you want to mount your LED profile.
Do you have recessed surfaces? Do you have a gypsum ceiling? Or do you want the easiest installation?
These questions will help you decide which type of LED profile is best for your needs.
in the end
Aluminum is a great lighting fixture that is both energy and space efficient.
You can use them in many ways and in almost any type of space.
Whether it’s a public space like a school or restaurant or a residential space like your living room, pull downs can seamlessly lift the lighting.
The simplistic nature of these lighting fixtures makes them very desirable for modern architecture.
Additionally, they are so easy to install that anyone can do it
LED Profile

We are pleased that you visit our social media pages, where we publish exclusive offers on our website.
Our Facebook page Here.
Our Twitter account Here.





Leave a Reply
You must be logged in to post a comment.