How to make hidden wiring in an apartment – step by step instructions

Content:
- What are the advantages of this method
- Step-by-step installation instructions
- Create a chart
- We prepare tools and materials
- Strobim walls
- Install the plugs
- Laying cables
- Features of working with drywall
What are the advantages of this method
Hidden wiring is used during housing repair or replacement of wires with new, more powerful ones.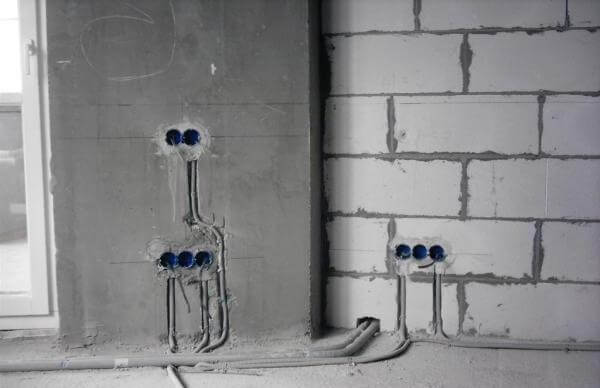
The advantage of umbilical cables inside walls is as follows:
- It does not deteriorate inside the rooms, as electrical wiring will be hidden under a layer of plaster or in drywall partitions.
- Increased fire safety of dwellings, if the walls are concrete and not wooden (or, for example, from gypsum or other non-combustible materials). This is due to the fact that when the insulation ignites, the fire will not spread further, due to the lack of oxygen and flammable substances.
- Increased service life of the power supply network associated with reliable protection of the cable against ultraviolet radiation and mechanical influences.
Among the shortcomings, it is necessary to highlight the complexity of installation, compared with the open method, as well as the complexity of repair and maintenance of hidden electrical wiring. The last two minuses are due to the fact that all wiring elements are hidden under a layer of plaster and to access them, destruction of the wall decoration will be required.
To summarize, it should be noted that for capital housing, this option is more correct and reliable than laying cables. As for the bath, garage, wooden houses and other buildings, here it is recommended to perform open wiring.
After settling the advantages, move on to the main question of the article!
Step-by-step installation instructions
So, now we will look at how to make hidden wiring in a brick house with our own hands on the example of small instructions.
Create a chart
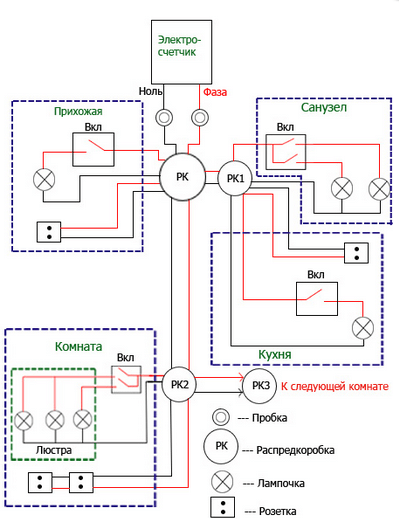
The first thing you should do is draw a wiring diagram, which will mark the cable route along the walls, places installation of sockets, switches and junction boxes in each room. Based on this scheme, the calculation of materials and, in fact, the installation of hidden electrical wiring will take place.
Recommendations for drawing up a scheme:
- The cable must run strictly vertically and horizontally on the surface. The only rule is that the distance from the floor and ceiling should be 15-20 cm (for convenience of repair and installation of hidden wiring).
- The height of the socket and circuit breakers is not standardized and is usually selected based on individual circumstances.For example, in the kitchen, the outlet can be installed above the countertop, and in the hall behind the TV. The junction box is installed at the entrance to the room.
- In parallel installation, the distance from the wiring to the heating pipeline, hot water supply, cold water supply, etc. must be at least 100 mm (PUE 2.1.57). The distance to pipelines containing flammable gases or liquids (gas gas) must not be less than 400 mm.
- If the wires cross the pipeline, the distance should be at least 50 mm, and if the gas rises, at least 100 mm. Moreover, if the wire is laid at a distance of less than 250 mm – it must be protected against mechanical damage (for example, with a metal hose) at a distance of 250 mm to each side of the intersection, in accordance with PUE 2.1.56.
- The distance from the gas pipeline to the outlet, according to PUE 7.1.50, should be at least 0.5 m.
- If the pipeline is hot, it is necessary to provide protection of the cable from high temperatures, at least when crossing, even with parallel installation.
- According to PUE, p. 2.1.67, it is impossible to lay wires in ventilation shafts, and according to SNIP 41-01-2003, p. 7.11.16 – the cable is laid at a distance of at least 100 mm from the walls of the duct.
We prepare tools and materials
At this stage, it is necessary to calculate, in accordance with the completed project, the number of sockets and switches as well as the length of the connector to perform the installation of hidden wiring in the walls. First you need to calculate the cable section to determine the most suitable core diameter. If this point is ignored, a danger may arise due to the fact that the conductor will not be able to withstand current loads from powerful electrical appliances. Next, choose the most suitable types of switches and sockets for the rooms, for example, in the bathroom, you need to use waterproof products (for security reasons).
The minimum materials are as follows:
- Sources
- Circuit breakers
- Sources
- Junction boxes
- Cable
- Protective plastic corrugation (optional);
- Terminal blocks;
- Electrical tape
- Jabs mortar
For the tools, you will need the following wires:
- shtroborez, grinder or punch (for shtrobleniya);
- Chisel and hammer
- Multiple.
- Stripping tool or electrician’s knife.
- Screwdriver set
- Building level
- lead pencil
- shovel.
About how to make an estimate for wiring we talked in a separate article. After preparing all the necessary kit, we can proceed to installing hidden electrical wiring in the house with our own hands!
Strobim walls
If you are making repairs in a prefabricated house and in Khrushchev, it is important for you to know that it is forbidden to paint the load-bearing walls in them. You can make a strobe in sections. This is documented, for example, in Moscow by Decree of the Moscow Government of February 8, 2005 N 73-PP “On the Procedure for Reconstruction of Buildings in Residential Buildings on the Territory of the City of Moscow”. The use of illuminated walls in such homes is strictly prohibited (paragraph 4.2). In accordance with Government Resolution No. 508 (paragraphs 11.3 and 11.11 of Appendix No. 1).
We have figured out the nuances on the side of the law, and we will go directly to the main process. The first thing to do is paving the walls if the installation will be carried out in a brick or panel house. Before batting, it should be applied to the surface of the walls. Coding, which will go through the creation of holidays. We presented a very interesting technology of marking on the walls for wires in the article Installation of electrical wiring in a house where a chalk-dyed rope was used.
Remember that noisy work, according to the law, can take place from 9 am to 7 pm, and on Sunday it is absolutely impossible. Otherwise, individuals face a fine from 1 to 5 thousand.
When the walls are marked, we take the grinder in our hands and start cutting the groove. This is done simply – cut two parallel lines at a distance of 3-4 cm from each other. Next, a chisel and a hammer strike a bar, which will be the finished lamp. The depth of the strobe of hidden wires depends on the cross-section of the cable and the presence of protective corrugation. In any case, the depth should be chosen with a small margin associated with the application of a layer of plaster to level the surface.
Instead of a grinder, you can use a special tool – a chamfer, which will evenly and without dust create suitable cavities. The problem is that the price of this tool is very high and there is no point in buying it once to install hidden electrical wiring in a private house. However, in this case, you can find a way out – cut yourself!
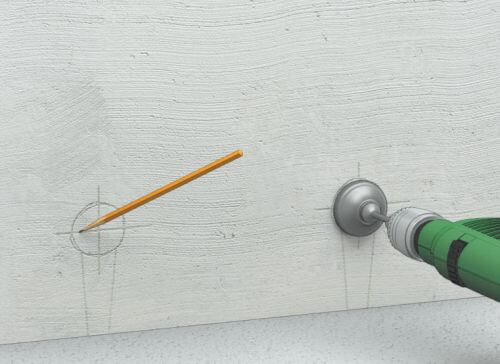
Do not forget also to make recesses for sockets and junction boxes. To do this, it is better to use a drill with a special crown. For concrete, block stones and other hard materials, crowns with victorious soldiers or diamonds are used. There are also special crowns for wood and drywall, usually sold as a set with a replaceable cutting part of different diameters. The diameter of the crown is selected for the distribution box and the socket that you will install, note, it is the standard size of the bushes – 68 mm.
Install the plugs
At this stage, everything is simple – you need to perform in the prepared holes installation of sockets and flush-mounted junction boxes. 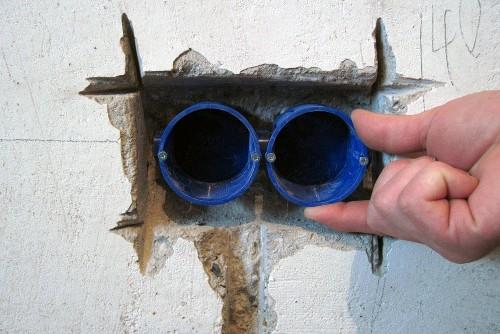 In order for them to reliably “sit” in their places, they use gypsum (alabaster) mortar, which reliably holds the plastic to the concrete. The edges of the products should be laid flush so that there are no problems with the decorative finish of the walls.
Laying cables
Now that the plugs and junction box are installed, you need to run hidden electrical wires through the hatches. First, cut the cable into appropriate lengths (for example, from box to switch), leaving a small margin for connecting the cores. Next, we place the parts in the cavities under the ceiling and in the walls, after which we prime them with gypsum mortar.
Places for processing (fixing) wires should be at a certain distance from each other, which is regulated by SNiP 3.05.06-85, today its updated version is SP 76.13330.2016. In short, in horizontal and vertical sections with hidden cable laying, the distance should be 0.5 m for cable bundles and 0.9 for single cable laying. Using open wiring, horizontal sections are installed every half a meter, and vertically – through a meter.
You can also connect the cable yourself hidden in the floor, but this installation option is not entirely good because repair and maintenance of internal electrical networks will be difficult.
Regarding protective corrugation, the question is individual, you cannot use it. The purpose of corrugation is to provide additional protection against mechanical damage. If you choose VVG cable marking, you do not have to worry about additional protection, as the insulation of this conductor is very reliable.
When the line is caught with plaster in some places (as shown in the picture), it is necessary to loop the hidden wires to check that all connections are correct and that the electrical current is working properly. If everything is fine – putty on the wall.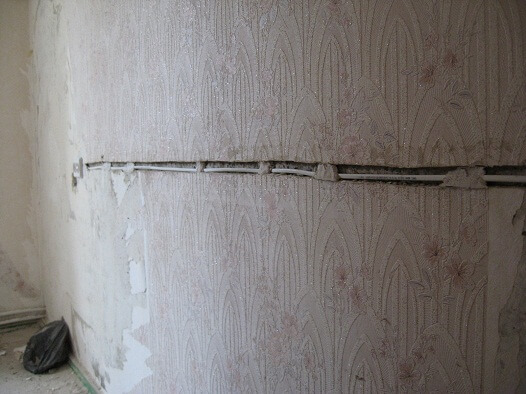
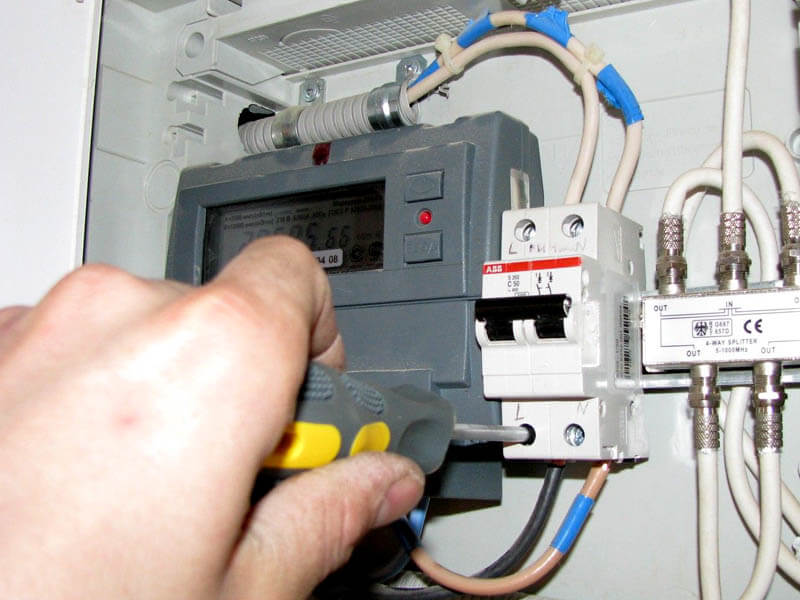
This is the whole technology for installing hidden electrical wiring in a brick house and apartment with your own hands. As you can see, there is nothing complicated, the main thing is to observe the color discrimination wires when connecting the veins, and do everything carefully. Upon completion of the work, sockets and switches are installed, protective automation is installed on the switchboard, after which you can proceed to installing the chandeliers and arranging the rooms .
The only thing I would like to talk about is plasterboard walls, because above, we gave instructions for hidden installation of electrical wiring in concrete and brick, which is much more complicated and is used less and less today.
If you decide to perform hidden electrical wiring in a wooden house (panel, frame, or from a wooden house), we recommend that you familiarize yourself with the article we have indicated.
Features of working with drywall
In the installation of hidden electrical wiring in drywall things are much easier because in this case, no strobe is needed. The line is drawn under the sheets of plasterboard partitions between the structure of the profiles, as shown in the photo. It therefore fulfills the conditions stipulated in EMP 2.1.37-2.1.40.

The problem is that if the insulation of the conductor is damaged leakage current can occur in the profile. The result of leakage is the possibility of electric shock. To prevent this from happening, it is recommended to lay the cable in a corrugated, preferably plastic tube. In places where junction boxes are installed, it will be necessary to cut special holes in the drywall for quick access.
That’s all I wanted to tell you about how to secretly connect wires in concrete and plastered walls with your own hands. As you can see, installing hidden electrical wiring in a brick house and apartment is not difficult.
If you have any inquiry, please contact us freely and we will be happy to serve you.

Jezli website for purchasing electrical appliances
When we say Jeezly website, we are talking about one of the most famous Arab websites that was able, in a very short period of time, to achieve a very large demand for purchases from it by people from various parts and sectors of the Arab world.
On the Jeezly website, you will find a joint look and all the products that you may need in your home, starting with those for kitchens or bathrooms, but even those for gardens, you will find them on this wonderful site.
So, if you were lost before and did not know where to go to buy your products on the Internet, now you have the perfect solution, and all you have to do is go to the Jezli website and start choosing the products you want.
 What are the features of Jeezly ?
Since we are talking about a site that is preferred by many people around the world, there is no doubt that it is a site full of various features and characteristics. Therefore, we have decided to devote our next paragraph to pointing out the most prominent features of the Jezli site.
One of the most prominent features of the site is the proportionality of prices. On the Jeezly website, you do not have to worry about the imaginary prices of the products, as is the case with most sites that display their products on the Internet.
The price of delivering products is very reasonable and not expensive, and the site accepts delivery to various countries, without forgetting that it accepts free shipping on some products.
One of the advantages of the site is also the high quality of its products, as it is impossible to find a poor quality product. Rather, the Jezli website deals with major companies, Philips, for example, and other famous brands, so you must remove from your mind the idea of the poor quality of one of the products. Another advantage of the site is that it does not specialize in one type of product, but rather you will find various types of products on it, for example, electrical appliances, hand tools, mechanical devices, paints, packages for establishing apartments, and many other types.
Jeezly website also accepts what is known as the shopping cart, which makes it easy for you to filter the products you want to buy and put them in one package in order to be able to pay with the click of a single button.
Accepts multiple payment methods.
We are pleased that you visit our social media pages, where we publish exclusive offers on our website.
Our Facebook page is here .
Our Twitter account is here .
















Leave a Reply
You must be logged in to post a comment.