Proper grounding in the home
Proper grounding in the home
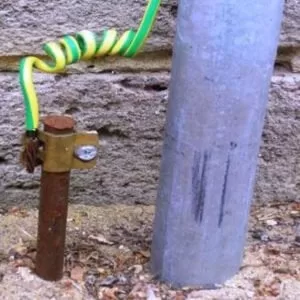
Content:
- The importance of the issue
- Ground loop device
- We develop a scheme
- We prepare tools and materials
- Installation works
- Step 1 – Choose a location
- Step 2 – Earthworks
- Step 3 – Assemble the design
- Step 4 – Verification
The importance of the issue
If you are wondering whether it is necessary to perform grounding in a country house or country house, we say right away that you cannot do without a protective circuit. Even according to PUE, SNiP and GOST standards, it is necessary to make a special tap, which will protect you from electric shock. Organization of the system TN-S (its correct name) in the 220 and 380 V network must be produced during construction, as after that, it is more expensive to do it (it will be necessary to change the two-wire cable to a three- or five-wire cable throughout the house).
If you buy a house where there is no land, you need to install and connect it. Installing the grounding system is very simple. In addition to grounding, it is necessary to create lightning protection.
Ground loop device
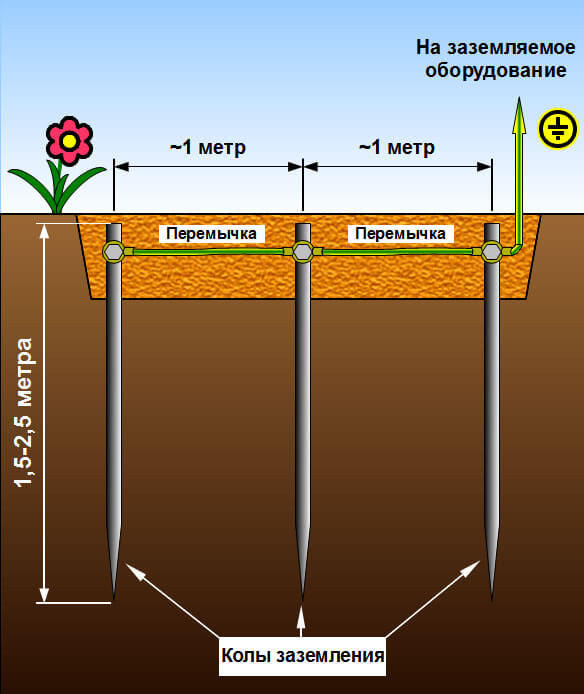
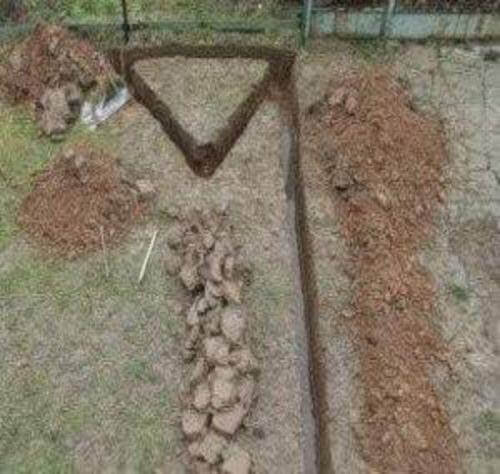
The contour of the grounding device consists of electrodes drilled into the ground and interconnected by an electrode – a metal rod or metal strip. Usually, the ground loop is made in the shape of a triangle or square. The photo shows how to install electrodes in a trench.
Using a grounding device, vertical grounding conductors should be placed at a depth of 0.5-0.6 m from the level of the planning level of the ground and protruding from the bottom of the trench by 0.1-0.2 m. The distance between the electrodes is 2.5-3 m. Connecting strips between vertical earthing switches are placed in trenches 0.6-0.7 m deep from the level of the planning level of the earth.
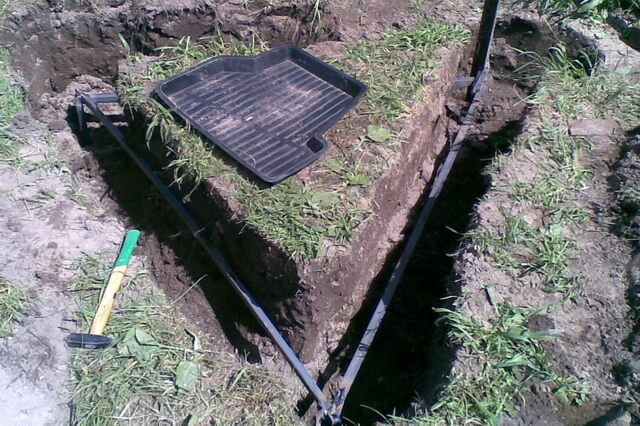
The ground loop is connected at two places with the help of earthing conductors with the internal earthing network of the house. It can be made as shown in this photo: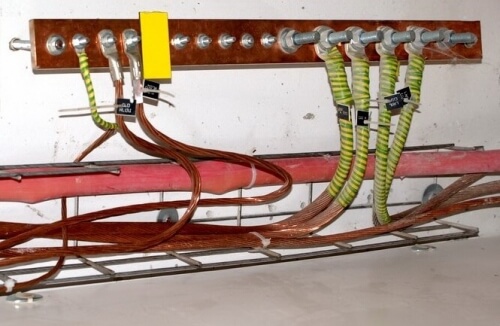
The photo shows that the ground bar is firmly attached to the wall. Grounding strips can be attached with screws or a construction gun directly to the wall or using intermediate parts. Strips of sheet or strip steel 6 mm thick are shot with a gun. The base must be made of concrete or brick.
Next, we will give you a description of how to arrange it step by step in your home.
We develop a scheme
The first step is to determine the grounding scheme in a private house, according to which you will need to create the entire system.
To date, there are two popular systems:
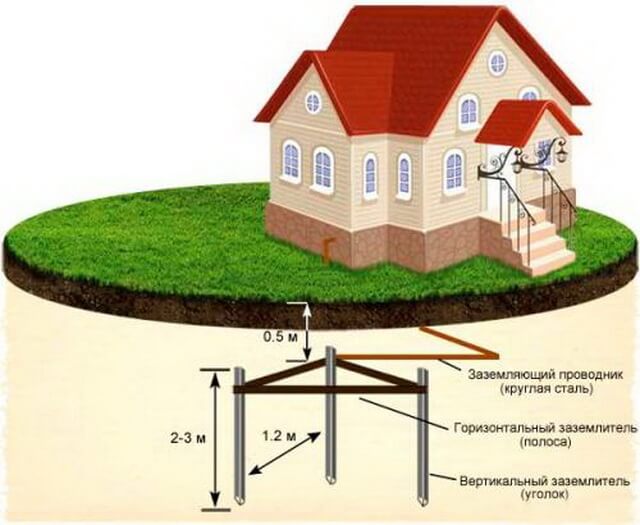
- Closed (triangle-shaped). Its advantage is more reliable operation, as if the metal jumper between the pins is damaged, the system will still work (on the other hand). All dimensions of the triangle are shown in the picture:
- Linear In this case, all the pins are drilled in one line, and the row is connected in series. The disadvantage of a home grounding system is that if the first jumper is damaged, all of them will fail (collar principle).
We recommend that you do the grounding in a private house according to the triangle scheme, because in fact, the installation work will not change (you still have to drill three holes and drive three pins), but at the same time, the efficiency will be several times higher than that of the built-in circuit.
In addition to the grounding schemes presented above in a private house, you can create your own version. For example, enclose the corners in a rectangle or oval. For example, we recommend printing four of the most popular options:
Another important point is the distance between the electrodes. The figure above shows a distance of 1.2 m between the electrodes, 2-3 m long. This is not entirely true. It is better to make the distance between the electrodes equal to their length, or at least 3 meters.
The thing is that with a small distance between the ground electrodes, the areas of propagation of electric current will overlap each other, which means that with current leakage, the system will not be effective. That is why it is better to separate the ground electrodes slightly from each other, and most importantly – to reliably connect them with welding or special clamps.
We prepare tools and materials
For grounding installations in a country house (for example, in the country), you will need:
- Welding machine (its presence is necessary, because connecting panels and fittings without welding will not create a high-quality connection, especially under the soil);
- Grinder (cutting metal into suitable pieces);
- Bayonet shovel
- hammer drill;
- sledgehammer (the heavier, the better, because you have to drive the nails 2 meters deep);
- A set of wrenches (tighten the screw).
If you have at least a little electrical skills.
Materials should be used from:
- Stainless steel metal corner with dimensions 50 * 50 mm with a length of at least 2 meters. An alternative is a water pipe made of steel with a diameter of 32 mm, a wall thickness of at least 3.5 mm, or fittings. You can also use a rectangular profile, the main thing is that its cross-sectional area does not exceed 150 mm2 .
- Three strips of metal, 120 cm long, 4 cm wide, and at least 4 mm thick.
- Stainless steel metal strip 40*4mm, length from the system bed to the hallway of the house.
- M8 or M10 bolt.
- Copper wire, for example, PV-3, with a thickness of at least 6 mm2 ( depending on the section taken for the phase conductor).
Important! Do not save on the thickness of the ground conductors, as the durability and reliability of grounding will depend on this!
After preparing everything you need, you can proceed to the manufacture of grounding in a private house.
Installation works
Step 1 – Choose a location
First you need to decide where you want to make the ground loop. The importance of this stage is very high, because the safety of using the system depends on the choice of the place of grounding in the summer house. If there is a break in the wiring, as a result of which the protection will work, then in the place where the pins are located, there should not be anyone. The presence of a person or animal in the place where electricity is being transferred to the soil can cause death. That is why the location of the electrodes is chosen taking into account the fact that there will be no one here.It is better to place a branch along the fence behind the house, at a distance of no more than 1 meter from the foundation of the building. In addition, it is recommended to make a low fence or boundary to protect an unsafe area.
If you do not want to spoil the landscape design of the site, we recommend organizing the grounding system of a residential building under rocks or some kind of volumetric sculpture. In this case, no one can be in the danger zone and nothing will harm the beauty of the warehouse!
Step 2 – Earthworks
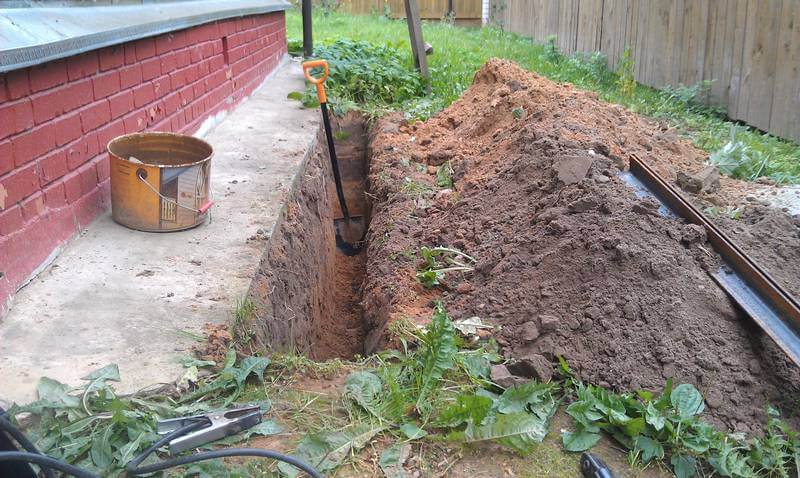
As an example, we will consider how to properly make grounding in a private house a triangle according to the scheme we considered above. At this stage, it is necessary to dig a triangle with sides of 2-3 m with a shovel (the optimal distance between the corners). The depth of the trench should be 50 to 70 cm. The same trench should be dug on the porch of the house.
Proper grounding in the home
Step 3 – Assemble the design
Now the main part of the process begins. According to the scheme, it is necessary to hammer the electrodes 2 m into the ground (so that only the tops remain, which need to be held by welding).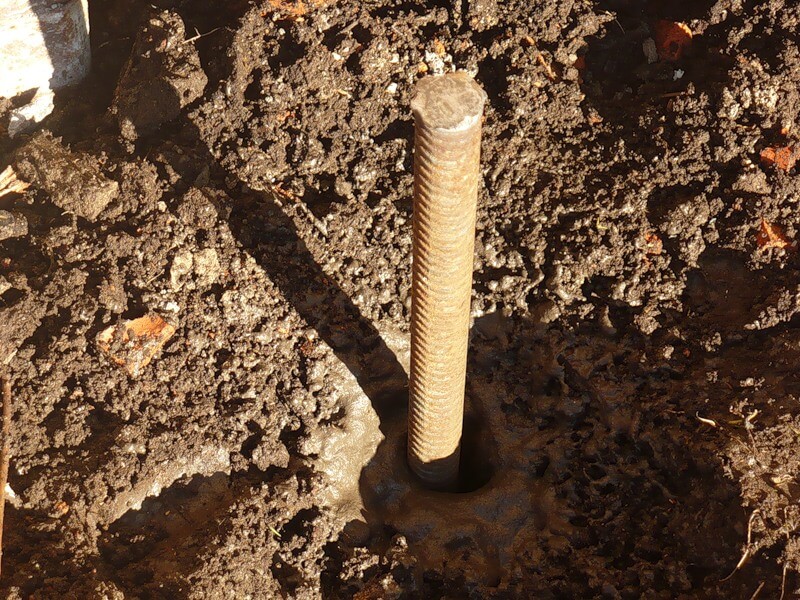
It is recommended that the grinder grind the driven end so that it penetrates the soil more easily.
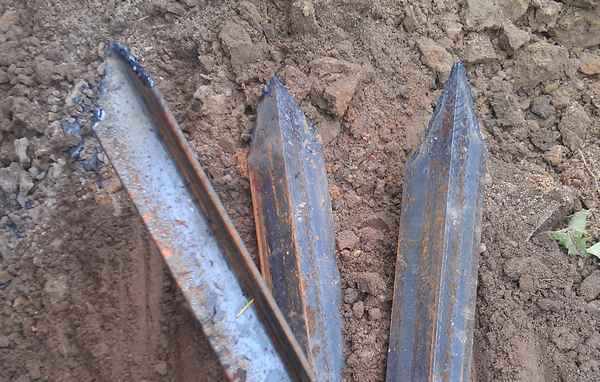
When all the nails are driven in, it is necessary to weld the boards on top to obtain a triangular metal frame (as shown in the photo).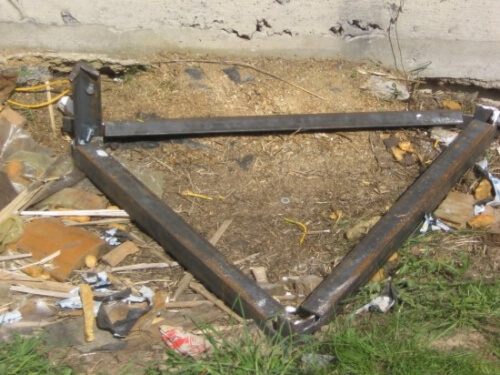
Another plate is placed in a long trench running towards the house, and is held by one end nearest the apex of the triangle.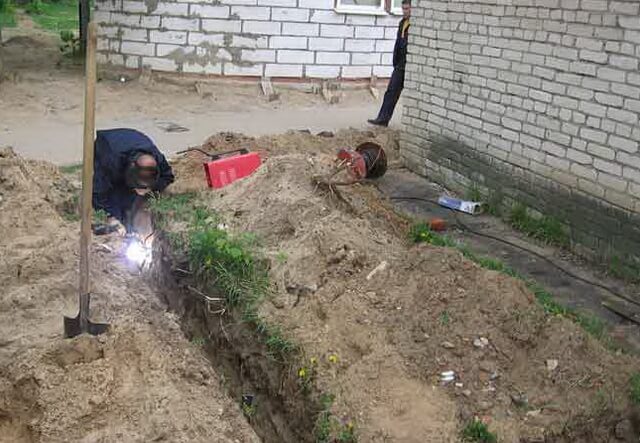
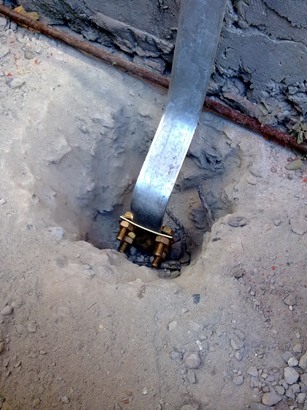
After that, you can proceed to attaching the cable to the board using a nail, and in the end, fill all the holes with soil.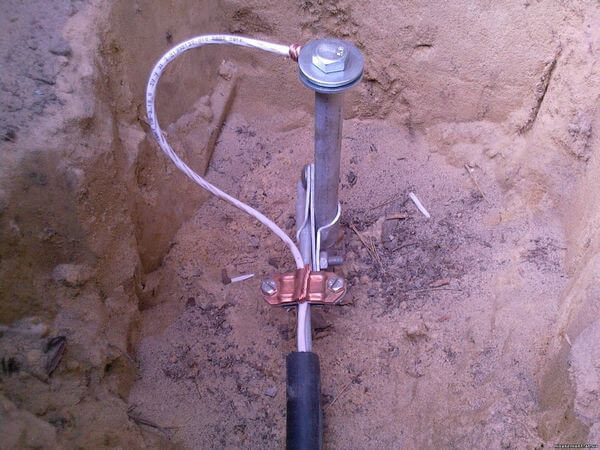
An important nuance – if the site is represented by a sand pillow, you will need to increase the conductivity of the soil with a salt solution. Liquid should be poured under the base of all electrodes. The disadvantage of such an event is that the metal begins to give in to corrosion faster, which makes the grounding in a private house not as strong as necessary.
Step 4 – Verification
The last thing you need to do is measure the final grounding resistance in a private house. In a good way, it is necessary to use a special electrical device for measuring, which has a very high cost.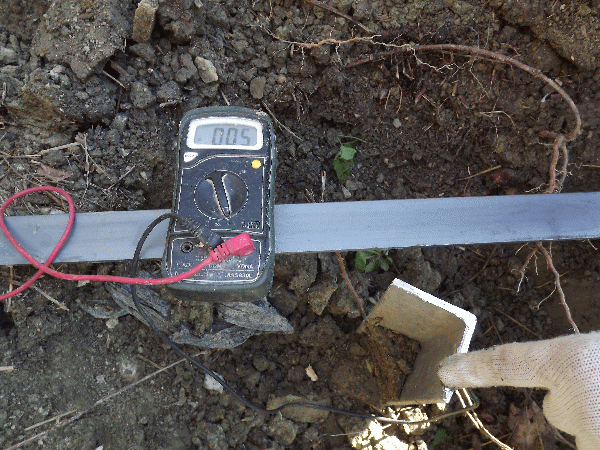
At home, you can go the other way to solve the problem, it is easier to check the performance with a lamp with a power of at least 100 watts. All that is required is to connect the light source with one contact to the ground loop and the other to the phase.
If the lamp burns brightly – the grounding in your house is poorly installed, the connection between the structural elements is poor and it is necessary to re-connect the joints. If the light doesn’t come on at all, you’ve gone wrong somewhere and will need to completely review the entire system, perhaps starting with the circuit itself! More about measuring ground loop resistance we talked in a separate article.
These instructions end. We hope you now know how to make the floor in a private house with your own hands! We draw your attention to the fact that this technology and all sizes are suitable for summer cottages as well.
If you have any inquiry, please contact us freely and we will be happy to serve you.

Jezli website for purchasing electrical appliances
When we say Jeezly website, we are talking about one of the most famous Arab websites that was able, in a very short period of time, to achieve a very large demand for purchases from it by people from various parts and sectors of the Arab world.
On the Jeezly website, you will find a joint look and all the products that you may need in your home, starting with those for kitchens or bathrooms, but even those for gardens, you will find them on this wonderful site.
So, if you were lost before and did not know where to go to buy your products on the Internet, now you have the perfect solution, and all you have to do is go to the Jezli website and start choosing the products you want.
 What are the features of Jeezly ?
Since we are talking about a site that is preferred by many people around the world, there is no doubt that it is a site full of various features and characteristics. Therefore, we have decided to devote our next paragraph to pointing out the most prominent features of the Jezli site.
One of the most prominent features of the site is the proportionality of prices. On the Jeezly website, you do not have to worry about the imaginary prices of the products, as is the case with most sites that display their products on the Internet.
The price of delivering products is very reasonable and not expensive, and the site accepts delivery to various countries, without forgetting that it accepts free shipping on some products.
One of the features of the site is also the high quality of its products, as it is impossible to find a poor quality product. Rather, the Jezli website deals with the major companies, Philips, for example, and other famous brands, so you must remove from your mind the idea of the poor quality of one of the products. Another advantage of the site is that it does not specialize in one type of product, but rather you will find various types of products on it, for example, electrical appliances, hand tools, mechanical devices, paints, packages for establishing apartments, and many other types.
Jeezly website also accepts what is known as the shopping cart, which makes it easy for you to filter the products you want to buy and put them in one package in order to be able to pay with the click of a single button.
Accepts multiple payment methods.
We are pleased that you visit our social media pages, where we publish exclusive offers on our website.
Our Facebook page is here .
Our Twitter account is here .





Leave a Reply
You must be logged in to post a comment.